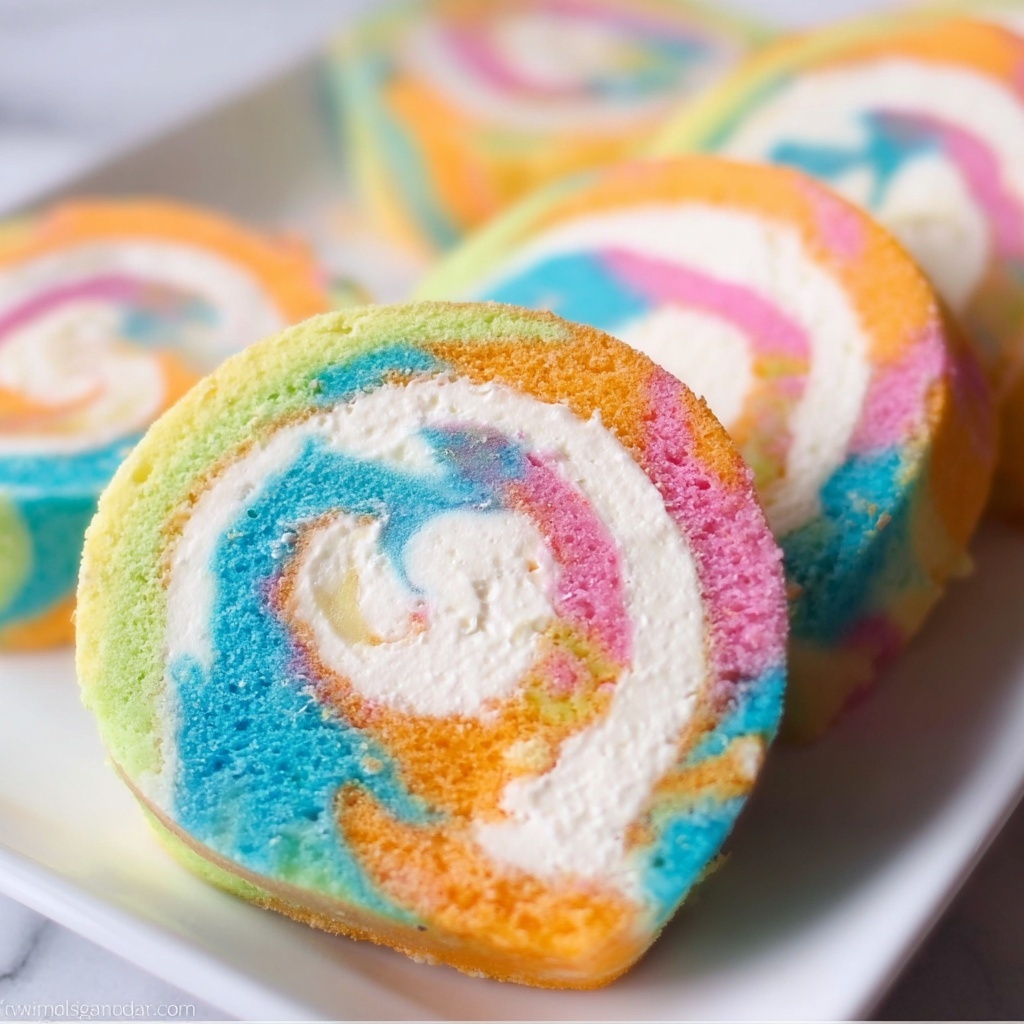
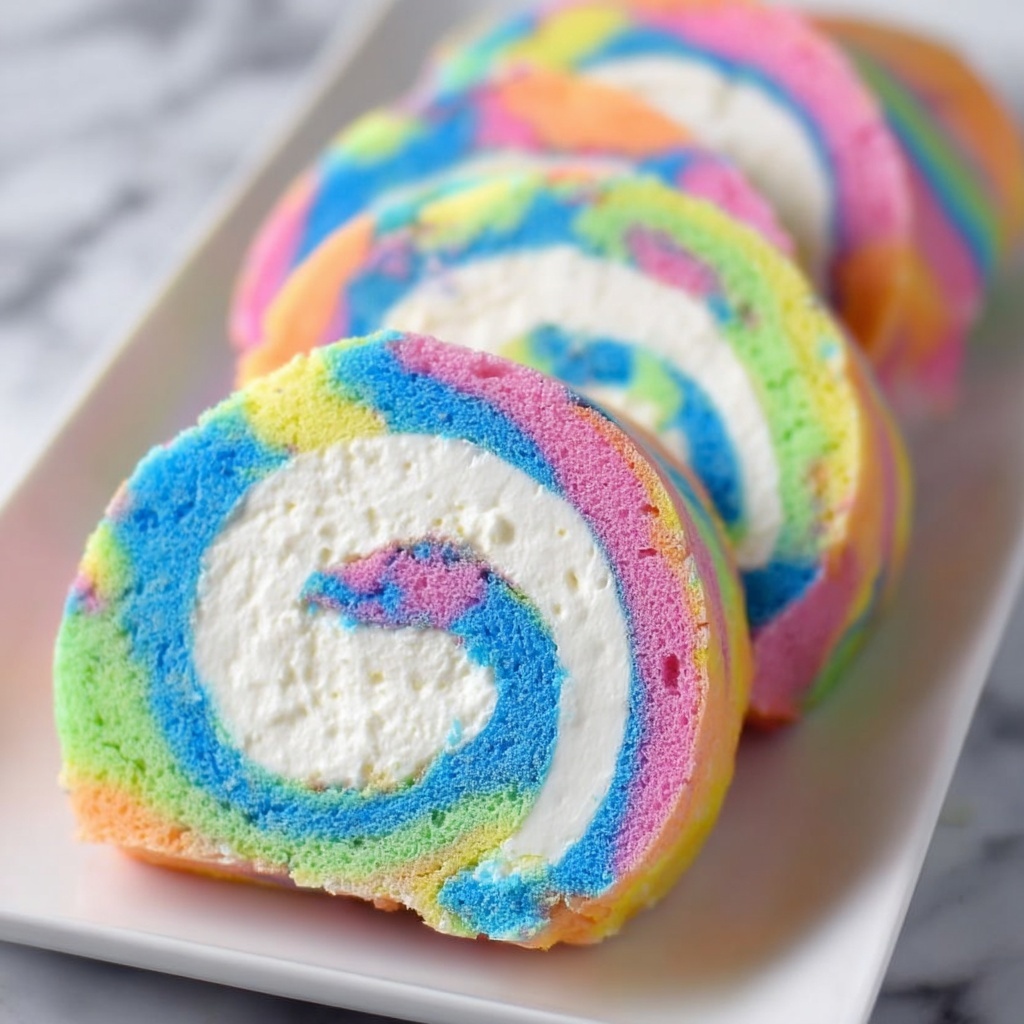
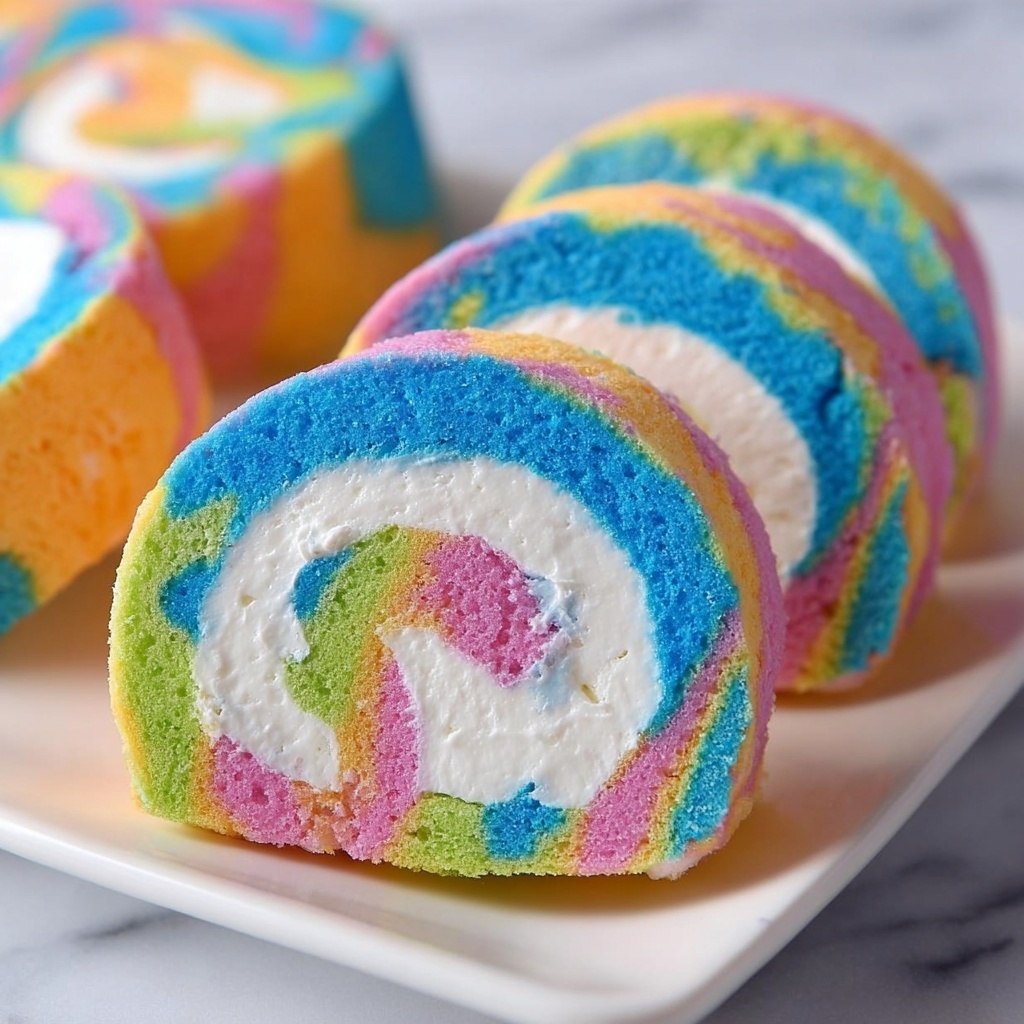
If you are looking for a vibrant and fun dessert to dazzle your guests or simply brighten your day, the Tie-Dye Pinwheel Cake Recipe is your new best friend. This cake combines the classic, tender texture of a white cake with a playful explosion of neon colors arranged in psychedelic swirls that look almost too beautiful to eat. Each bite offers a perfect balance of moist cake and creamy vanilla frosting, making it an unforgettable treat for birthdays, celebrations, or just because. Honestly, it’s hard not to smile when you see those vivid hues spiraling through every slice!
Ingredients You’ll Need
Creating this spectacular cake is easier than you might think because the ingredients are simple and each plays a key role in the magic. From the basic white cake mix to the bright neon food dyes, every component adds its own special flair to the taste, texture, or eye-catching color of the final masterpiece.
- White cake mix: The base of your cake that guarantees a light and fluffy texture with minimal effort.
- Neon food dye colors (6): These deliver the vibrant tie-dye effect, making the cake look like a true work of art.
- Butter (½ cup, softened): Adds richness to the frosting and helps achieve a creamy consistency.
- Vanilla extract (1 tsp): Provides a lovely aromatic depth that pairs perfectly with the sweetness of the cake.
- Powdered sugar (3 cups): The foundation of the frosting’s sweetness and silky smooth texture.
- Milk (3-4 tbsp): Used to adjust the frosting’s consistency for easy spreading.
- Shortening and flour for pan prep: Ensures the cake doesn’t stick and rolls out perfectly.
How to Make Tie-Dye Pinwheel Cake Recipe
Step 1: Preheat and Prep Your Pan
Start by preheating your oven to 325ºF to create the perfect baking environment. Prepare your jelly roll pan with a light coating of shortening and a dusting of flour; this step is crucial for preventing sticking and helps your cake roll up beautifully later on.
Step 2: Prepare the Cake Batter
Mix the white cake batter according to the box directions—you’re aiming for smooth and lump-free. Then, divide the batter evenly into six bowls, setting the stage for the colorful fun to come.
Step 3: Add Color
Add a different neon food dye to each bowl, mixing until the colors are consistent and vibrant throughout. This creates the distinct tie-dye colors that make this cake so special.
Step 4: Create the Color Pattern in the Pan
Transfer each colored batter into a ziplock bag and carefully snip a small corner off. Squeeze diagonal stripes of batter onto the jelly roll pan, filling and layering colors until the entire pan is covered. Gently shake the pan to level the batter and use a toothpick to swirl the colors together to achieve that perfect tie-dye effect.
Step 5: Bake and Cool
Bake the cake for about 18 minutes or until it’s set and springy to the touch. Remove it from the oven and let it cool for 20 minutes while preparing for the tricky—but totally doable—rolling part.
Step 6: Roll the Cake
Sprinkle flour on a clean towel and carefully flip the cake onto it. Sprinkle a little flour on top and cover with another towel. Then, starting from one end, roll the cake gently but firmly with the towels still wrapped around it. Leave it rolled up to cool completely; this train of thought keeps your cake from cracking later on.
Step 7: Make the Frosting
Beat softened butter and vanilla extract until fluffy, then gradually add powdered sugar and milk until you get the perfect spreadable frosting consistency. This frosting is the luscious finishing touch that balances the colorful cake’s sweetness.
Step 8: Frost and Roll the Cake Again
Once the cake is fully cooled, carefully unroll it and spread the frosting evenly over the surface. Then roll it back up tightly, using a towel to guide the roll and keep everything neat. Wrap the rolled cake snugly in a towel and freeze for at least 4 hours to help it hold its beautiful spiral shape.
Step 9: Slice and Serve
Remove the chilled cake from the freezer and slice into pinwheels to reveal those mesmerizing swirl patterns inside. Serve immediately and watch faces light up with every bite!
How to Serve Tie-Dye Pinwheel Cake Recipe
Garnishes
To enhance the vibrant colors and flavors, consider adding simple garnishes like fresh berries or a sprinkle of edible glitter that adds an extra pop of fun. Whipped cream or a dusting of powdered sugar can also complement the richness of the frosting without overpowering the colors.
Side Dishes
Pair your Tie-Dye Pinwheel Cake Recipe with light, refreshing sides like fresh fruit salad or a berry compote to balance the sweetness. A scoop of vanilla ice cream also makes for an irresistible combination with this lively dessert.
Creative Ways to Present
For parties, arrange the pinwheel slices on a bright platter that amplifies the neon theme, or serve each slice on colorful plates to keep the energy vibrant. Another fun idea is to stack the slices into a small tower or create a layered trifle-style dessert showcasing the rainbow swirls.
Make Ahead and Storage
Storing Leftovers
Wrap leftover pinwheel slices tightly in plastic wrap or store them in an airtight container to keep them fresh and moist for up to 3 days in the refrigerator. The frosting helps retain moisture, so the cake stays delicious even after a couple of days.
Freezing
If you want to save some for later, freezing is a great option. Wrap the whole rolled cake or individual slices tightly in plastic wrap followed by foil, then place them in a freezer-safe bag. This cake freezes well for up to 2 months without losing its beautiful texture or flavor.
Reheating
To enjoy the cake after freezing, thaw it overnight in the refrigerator. Serve chilled or let slices sit at room temperature for about 15 minutes before enjoying to soften the frosting and bring out the flavors.
FAQs
Can I use homemade cake batter instead of a box mix?
Absolutely! While this recipe is simplified by using a box mix, if you prefer homemade cake batter, just make sure it’s a white or vanilla cake base that’s not too dense so it rolls easily without cracking.
What if I don’t have six colors of food dye?
No worries! You can adjust the number of colors according to what you have. The more colors you use, the more vibrant the swirl, but even 3 or 4 shades can create a lovely tie-dye effect.
Is it necessary to roll the cake with a towel?
Yes, the towel helps prevent cracks by supporting the cake as it cools and forms that pinwheel shape. Flour on the towel ensures the cake doesn’t stick, making the rolling process smooth and easy.
Can this recipe be made gluten-free?
Yes! Use a gluten-free white cake mix and verify all other ingredients like powdered sugar and food dyes are gluten-free. This way, everyone can enjoy the Tie-Dye Pinwheel Cake Recipe.
How do I keep the colors from bleeding together?
Swirling gently with a toothpick ensures the colors blend artistically without turning muddy. Also, distribute the batter evenly and avoid mixing the colors too much for a crisp tie-dye appearance.
Final Thoughts
There’s something undeniably joyful about making and sharing the Tie-Dye Pinwheel Cake Recipe. It’s a brilliant celebration of color and flavor that’s sure to brighten any occasion and bring smiles all around. Give it a try—you’ll love watching your creation come alive as you slice into those mesmerizing swirls, and even more, you’ll love how delicious it tastes!