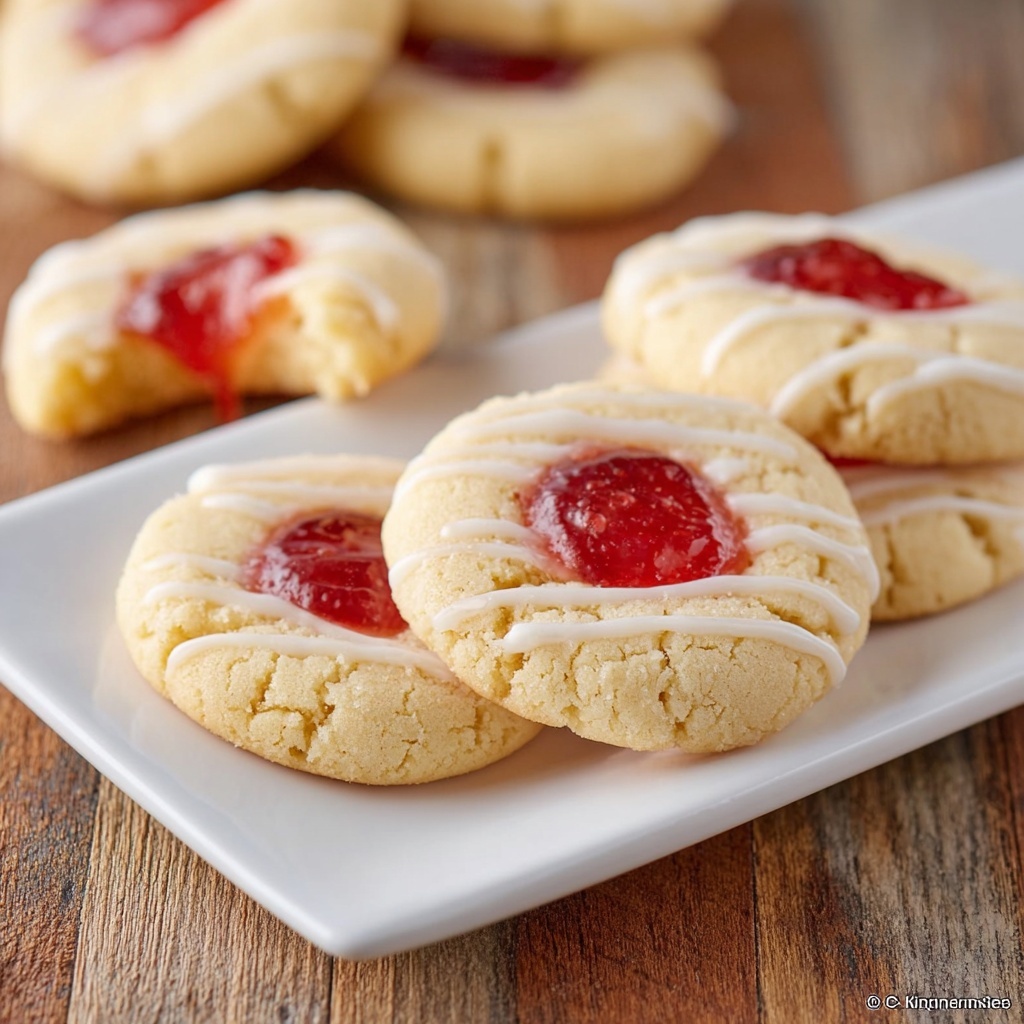
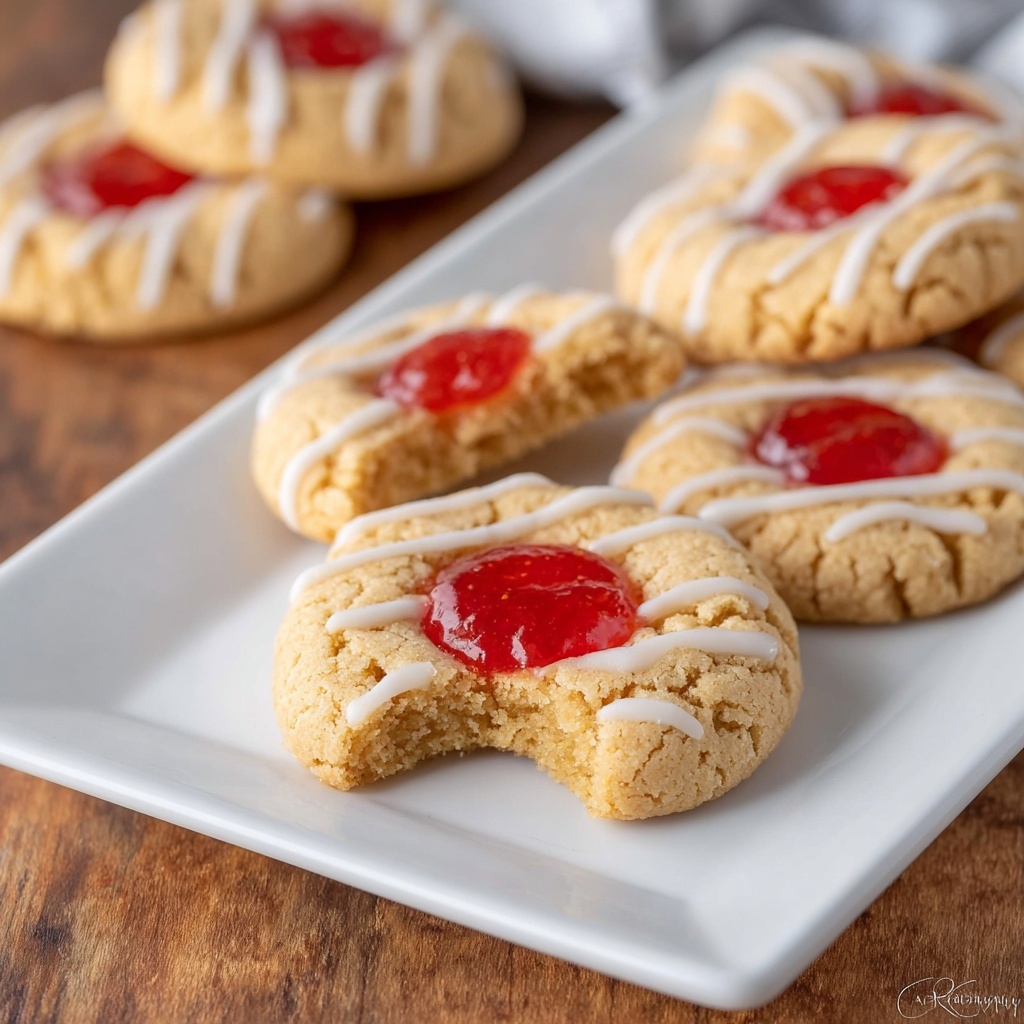
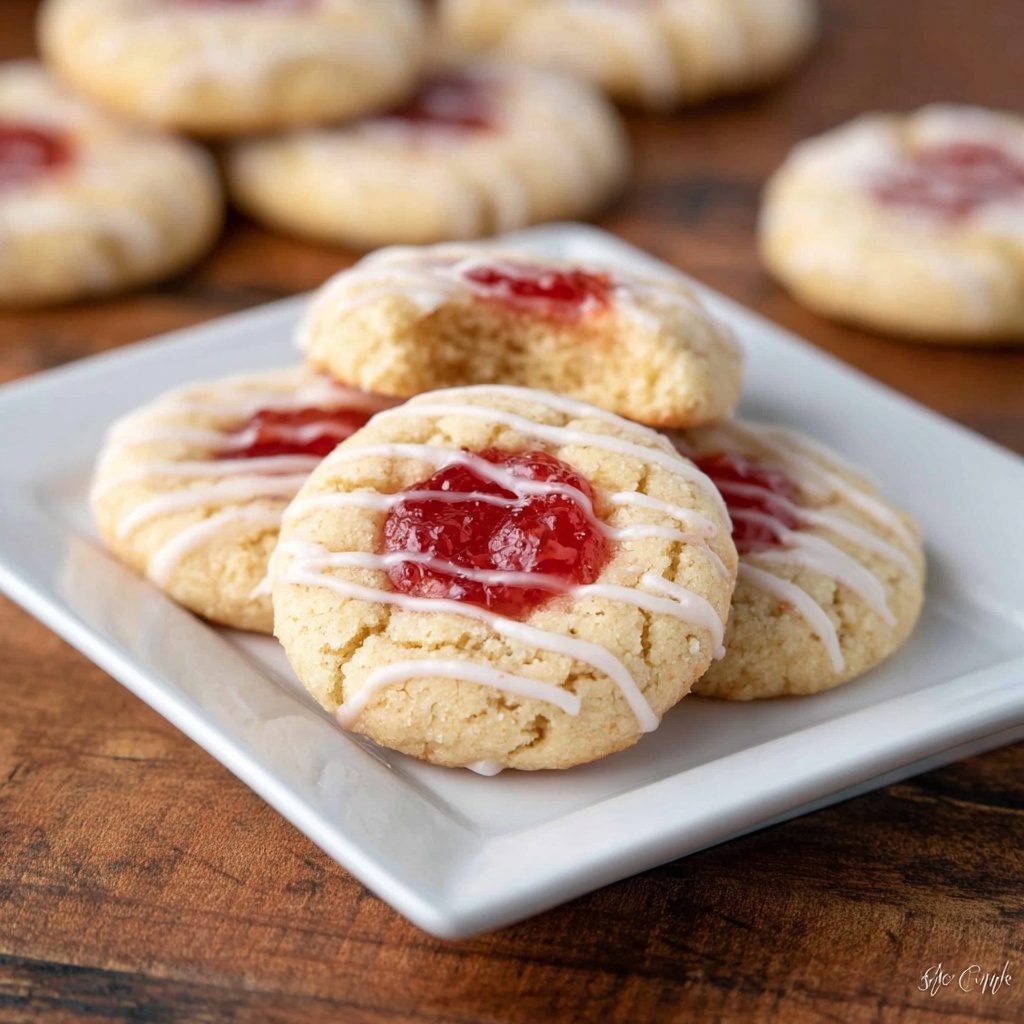
If you’re searching for a sweet treat that combines buttery, soft cookie dough with a burst of fruity goodness, you have to try this Strawberry Thumbprint Cookies Recipe. These charming cookies are perfect for sharing or indulging yourself, featuring a delightful jam-filled center that balances perfectly with a delicate vanilla-infused dough. Whether it’s a casual afternoon snack or a festive dessert, this recipe transforms simple pantry staples into a memorable homemade favorite you’ll want to bake again and again.
Ingredients You’ll Need
The magic behind these strawberry thumbprint cookies lies in their straightforward ingredients, each playing a crucial role in delivering the perfect flavor, texture, and appearance. From creamy butter lending richness to the touch of lemon in the glaze brightening every bite, every component counts.
- Unsalted butter (1 cup, softened): Gives the cookies their tender, melt-in-your-mouth texture without extra saltiness.
- Granulated sugar (2 1/2 cups, divided): Sweetens the dough and adds a sparkling sugar crust when rolled just before baking.
- Pure vanilla extract (2 teaspoons): Infuses the dough with warm, inviting flavor that complements the jam.
- Egg and egg yolk (1 each): Bind the ingredients and create a rich, chewy crumb.
- Unbleached flour (3 cups): Provides the structure without altering the dough’s taste.
- Baking powder (1 teaspoon): Helps the cookies rise just enough for a soft bite.
- Table salt (1/2 teaspoon): Enhances all the flavors in the dough.
- Baking soda (1/4 teaspoon): Adds a lightness to the crumb and helps with browning.
- Strawberry jam (1/2 cup): The heart of the thumbprint cookie, offering that fruity pop everyone loves.
- Powdered sugar (1 cup): Used for the sweet, tangy glaze topping the cookies.
- Lemon juice (2 teaspoons): Adds a fresh brightness to the glaze that balances the sweetness.
- Water (1–2 teaspoons): Adjusts glaze consistency for the perfect drizzle – 1.5 teaspoons works beautifully.
How to Make Strawberry Thumbprint Cookies Recipe
Step 1: Cream the Butter and Sugar
Start by beating the softened butter with 2 cups of the granulated sugar using a hand or stand mixer. This mix becomes the luscious, tender base of your cookies, so take your time to get a light, fluffy consistency. Hold onto the leftover 1/2 cup sugar — it’s for an important step ahead.
Step 2: Add Eggs and Vanilla
Next, mix in your pure vanilla extract, then add the whole egg and separate egg yolk. This not only enriches the dough but makes the texture wonderfully chewy while layering in that vanilla warmth that makes the cookies so inviting.
Step 3: Incorporate Dry Ingredients
Gently stir in the unbleached flour, baking powder, salt, and baking soda. Mixing slowly prevents overworking the dough, which ensures your cookies stay tender and delicate instead of tough.
Step 4: Chill the Dough
Wrap your dough and pop it into the fridge for a good 30 minutes. Chilling firms up the dough, making it easier to scoop and helping your cookies hold their shape while baking.
Step 5: Prep for Baking
Once chilled, preheat your oven to 375°F (190°C) and line your baking sheet with parchment paper. Getting everything ready before you shape the dough keeps the process smooth and stress-free.
Step 6: Shape and Sugar Coat the Cookie Balls
Using a 1-tablespoon cookie scoop, form perfectly sized balls. Roll each cookie ball in the reserved 1/2 cup sugar—this creates a delicate sparkle and a slightly crisp edge that’s so satisfying to bite into.
Step 7: Make the Thumbprint Indents
Use a 1/2 teaspoon or simply your thumb to press a gentle well into the center of each sugared cookie ball. This little thumbprint is key—it will cradle that luscious strawberry jam filling beautifully once baked.
Step 8: Add the Jam
Fill each indent with a small spoonful of strawberry jam or your preferred fruit preserves. This is where the magic happens, giving the cookies their signature flavor contrast and inviting color pop. Sprinkle a bit of sugar over the jam for extra sparkle.
Step 9: Bake
Bake your cookies for about 9-10 minutes, just until the edges begin to brown lightly. They’ll look delicate, but once cooled, they firm up to a tender but sturdy bite.
Step 10: Cool Completely
Let the cookies chill on the baking sheet until fully cooled. This step lets the jam set in place and helps avoid any messy spreading as you prepare the next step.
Step 11: Prepare and Drizzle the Glaze
Mix powdered sugar, lemon juice, and water until smooth to create a luscious glaze. Drizzle this over the cooled cookies for a glossy finish that adds a sweet-tart contrast and makes each cookie irresistibly pretty and flavorful.
How to Serve Strawberry Thumbprint Cookies Recipe
Garnishes
To elevate your strawberry thumbprint cookies, consider a sprinkle of finely chopped pistachios for crunch or a tiny fresh strawberry slice atop the glaze. These simple additions enhance both texture and visual appeal, making each cookie a delightful little work of art.
Side Dishes
Serve these cookies with a warm cup of tea or freshly brewed coffee for a lovely afternoon pick-me-up. They also pair beautifully with vanilla ice cream or a dollop of whipped cream if you want to turn them into a light dessert.
Creative Ways to Present
Arrange your cookies on a tiered dessert stand for a charming tea party or package them in pretty boxes tied with ribbons as thoughtful homemade gifts. You can even sandwich them with cream cheese frosting to create mini cookie sandwiches for a fun twist.
Make Ahead and Storage
Storing Leftovers
Keep leftover strawberry thumbprint cookies in an airtight container at room temperature for up to 4 days. This helps maintain the soft texture of the dough while keeping the jam fresh and flavorful.
Freezing
You can freeze the unbaked cookie dough balls rolled in sugar in a single layer on a baking sheet. Once frozen, transfer them to a freezer bag and store for up to 3 months. Bake directly from frozen, adding a minute or two to the bake time. Alternatively, freeze fully baked and cooled cookies between sheets of parchment paper in an airtight container.
Reheating
Reheat cookies in a 300°F (150°C) oven for 5 minutes to refresh the texture before serving. Avoid microwaving to prevent the jam from getting too hot and altering the cookie’s delicate balance.
FAQs
Can I use other jam flavors instead of strawberry?
Absolutely! Raspberry, apricot, or blackberry jams work wonderfully in this recipe. Just choose your favorite flavor to personalize the cookies to your taste.
Why do I need both an egg and an egg yolk?
The combination provides the right balance of moisture and richness, keeping the cookies soft and giving them a tender crumb with a slight chew, perfect for thumbprint cookies.
Can I make these cookies gluten-free?
Yes, by substituting the all-purpose flour with a gluten-free flour blend designed for baking, you can make delicious gluten-free thumbprint cookies. Just ensure the blend contains xanthan gum or add it separately for structure.
Is it necessary to chill the dough?
Chilling firm ups the dough, making it easier to shape and helps the cookies maintain their shape during baking. It also improves the flavor by allowing the ingredients to meld together.
Can I skip the glaze?
Of course! The glaze adds brightness and a bit of texture, but the cookies are delicious on their own with just the sugar coating and jam. The glaze is an extra touch for a bit of flair and flavor complexity.
Final Thoughts
These strawberry thumbprint cookies are truly a joy to make and eat. Their perfect combination of buttery dough, sparkling sugar, and vibrant jam filling makes them a surefire crowd-pleaser whenever you share them. I encourage you to try this Strawberry Thumbprint Cookies Recipe soon—it’s a sweet way to show love through baking that anyone can master and enjoy.