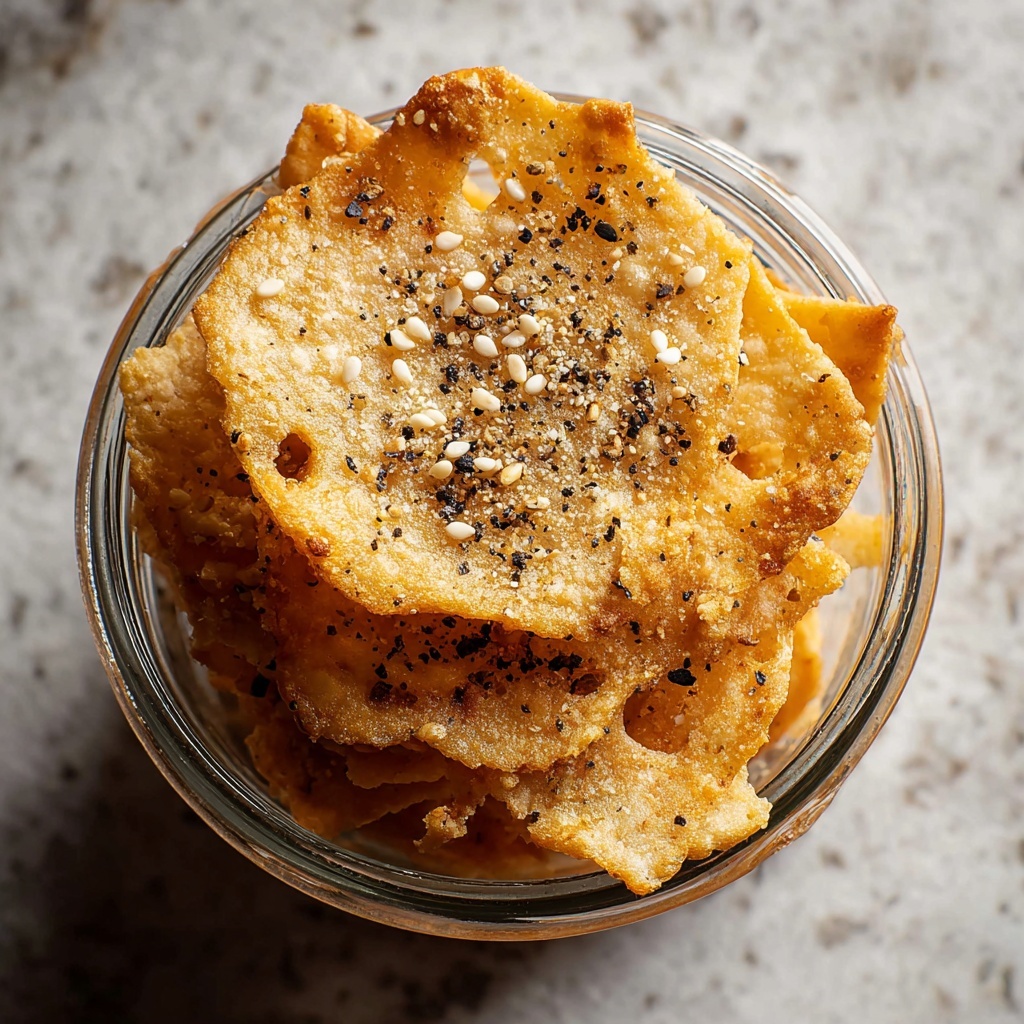
If you’re anything like me, you know that sourdough discard can pile up and feel a bit wasteful if you don’t find creative ways to use it. Enter the amazing Sourdough Discard Crackers Recipe—a simple, irresistibly crunchy snack that transforms your discard into a flavor-packed, crispy treat. These crackers not only make excellent use of what would otherwise be thrown away but also bring a touch of tangy, buttery goodness to your snack time. They are perfectly crisp, easy to customize, and such a crowd-pleaser that you’ll want to make them again and again.
Ingredients You’ll Need
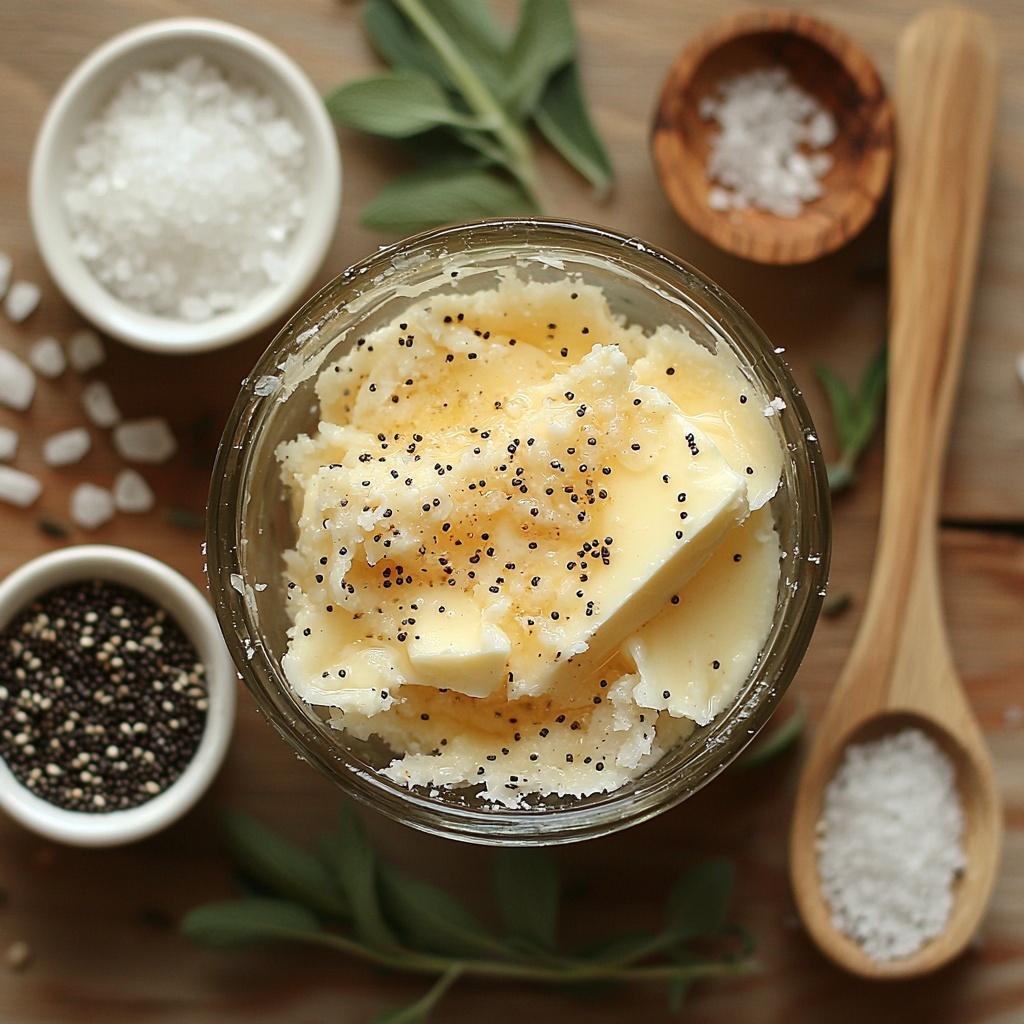
Don’t underestimate the power of simple ingredients for this recipe. Each one plays an important role, from texture to flavor, creating crackers that are satisfyingly crunchy with just the right amount of savory richness.
- Sourdough discard: 200 grams of unfed starter brings that classic tang and acts as the base for these crackers.
- Unsalted butter: 2 tablespoons melted butter add richness and a delicate flaky texture.
- Fine sea salt: 1/4 teaspoon enhances all the natural flavors without overpowering the crackers.
- Optional seasonings: flaky sea salt, everything bagel seasoning, or sesame seeds give the crackers a fun, personalized twist.
How to Make Sourdough Discard Crackers Recipe
Step 1: Prepare Your Oven and Baking Sheet
Start by heating your oven to 350°F (175°C). Line a baking sheet with parchment paper to ensure your crackers don’t stick and bake evenly. This simple prep step saves you cleanup time and makes sure everything slides off smoothly after baking.
Step 2: Mix Butter and Sourdough Discard
Melt the butter gently and let it cool slightly so you don’t cook the discard. Then, combine it with your sourdough discard and salt in a mixing bowl. Stir well until the mixture is uniform, which creates a beautiful, buttery batter that will crisp up in the oven.
Step 3: Spread the Mixture Thinly
Spread the discard mixture across your parchment-lined baking sheet in a very thin, even layer. The thinner, the crunchier! This step is key for achieving that perfect cracker texture without needing any additional flour or binders.
Step 4: Add Seasonings and Begin Baking
Sprinkle your chosen toppings—flaky sea salt, everything bagel seasoning, or sesame seeds—on top for an added flavor boost and visual appeal. Then pop the tray in the oven and bake for about 10 minutes until the edges start to look golden.
Step 5: Score and Finish Baking
Using a pizza cutter, score the warm cracker sheet into squares so you can easily break them apart later. Return the sheet to the oven, baking for another 15 to 20 minutes as the crackers turn a gorgeous golden brown and develop their signature crispness.
Step 6: Cool and Store
Once they’re perfectly baked, let the crackers cool completely on the tray. This final cooling step helps set their crisp texture. When cool, store them in an airtight container to keep them fresh and crunchy for days.
How to Serve Sourdough Discard Crackers Recipe
Garnishes
Adding fresh herbs like rosemary or thyme right after baking can uplift these crackers beautifully. A light brush of olive oil or a sprinkle of sea salt just before serving also adds a simple but delightful touch.
Side Dishes
These crackers are perfect alongside creamy dips like hummus, soft cheeses such as brie or goat cheese, or a tangy yogurt-based dip. They balance rich or mild flavors wonderfully, making snack time extra special.
Creative Ways to Present
Tuck these crackers into a cheese board with fresh fruit and nuts for an inviting appetizer platter. Or use them as a crunchy base for canapés topped with smoked salmon, avocado, or your favorite spreads. Their rustic charm instantly elevates any party spread.
Make Ahead and Storage
Storing Leftovers
Keep your leftover crackers in an airtight container at room temperature, and they will stay crisp for up to a week. Make sure they are completely cooled before sealing to avoid moisture buildup that softens the crackers.
Freezing
You can freeze these crackers in a sealed bag or container for up to a month. Just thaw them at room temperature when ready to eat—there’s no need to freeze and thaw if you plan ahead, but it works well for long-term storage.
Reheating
If your crackers lose their crunch, a quick 2–3 minute toast in a preheated oven at 350°F will bring back that delightful crispness, making them just as delicious as freshly baked.
FAQs
Can I use any type of sourdough discard for this recipe?
Absolutely! Both whole wheat and white flour sourdough discard work wonderfully here. Just make sure it’s unfed and stirred before mixing, as that gives the best texture and flavor.
Do I need to add any flour to the crackers?
Not at all. The sourdough discard combined with butter creates the perfect dough consistency. This makes the recipe straightforward and great if you want a low-flour snack.
What other seasonings can I try?
Feel free to experiment! Smoked paprika, garlic powder, dried herbs, or even a sprinkle of nutritional yeast can transform these crackers into different tasty variations.
How thin should I spread the dough?
As thin as you can manage without tearing. About 1/8 inch or less works best because thinner crackers bake evenly and get that satisfying crunch.
Can I make these crackers gluten-free?
This recipe relies on sourdough discard that is typically wheat-based, so for a gluten-free version, you’d need gluten-free starter discard and might have to adjust the butter and baking times slightly.
Final Thoughts
I can’t recommend this Sourdough Discard Crackers Recipe enough for anyone who wants to reduce waste and enjoy crunchy, flavorful snacks made from ingredients you already have. They’re easy to whip up, completely customizable, and always a hit whether for everyday munching or special gatherings. Give this recipe a try—you might just find your new favorite way to use sourdough discard!
Print
Sourdough Discard Crackers Recipe
- Prep Time: 5 minutes
- Cook Time: 30 minutes
- Total Time: 35 minutes
- Yield: 12 servings
- Category: Snack
- Method: Baking
- Cuisine: American
- Diet: Vegetarian
Description
Crunchy and delicious sourdough discard crackers made with simple ingredients like sourdough starter, butter, and salt. Perfect for snacking or pairing with cheese and dips, these easy-to-make crackers use leftover starter to reduce waste and add a rich, tangy flavor.
Ingredients
Main Ingredients
- 200 grams sourdough discard (1 cup stirred and unfed starter)
- 2 tablespoons unsalted butter (melted)
- 1/4 teaspoon fine sea salt
Optional Seasonings
- Flaky sea salt
- Everything bagel seasoning
- Sesame seeds
Instructions
- Preheat Oven: Preheat the oven to 350°F (175°C) and line a baking sheet with parchment paper to prepare for baking the crackers.
- Melt Butter: Melt the unsalted butter in a mixing bowl and allow it to cool slightly to avoid cooking the starter when mixed.
- Combine Ingredients: Stir the sourdough discard and fine sea salt into the melted butter until the mixture is well combined and homogeneous.
- Spread Mixture: Spread the dough-like mixture evenly into a thin layer on the prepared baking sheet for uniform baking.
- Add Seasonings: Sprinkle optional seasonings like flaky sea salt, everything bagel seasoning, or sesame seeds evenly over the surface to enhance flavor.
- Bake Initial: Bake the spread mixture in the preheated oven for 10 minutes to start drying and setting the crackers.
- Score Crackers: Use a pizza cutter to score the partially baked dough into squares to define cracker shapes.
- Final Bake: Return the baking sheet to the oven and bake for another 15-20 minutes until the crackers turn golden brown and crisp.
- Cool and Store: Allow the crackers to cool completely on the baking sheet, then store them in an airtight container to maintain crispness.
Notes
- Ensure the sourdough discard is unfed and stirred well to get the best texture.
- Spreading the mixture evenly and thinly is crucial for crispy crackers.
- Keep an eye on crackers during the final bake to prevent burning as ovens vary.
- Store cooled crackers in an airtight container to keep them crisp for up to a week.
- Feel free to customize the seasoning to suit your taste preferences.


