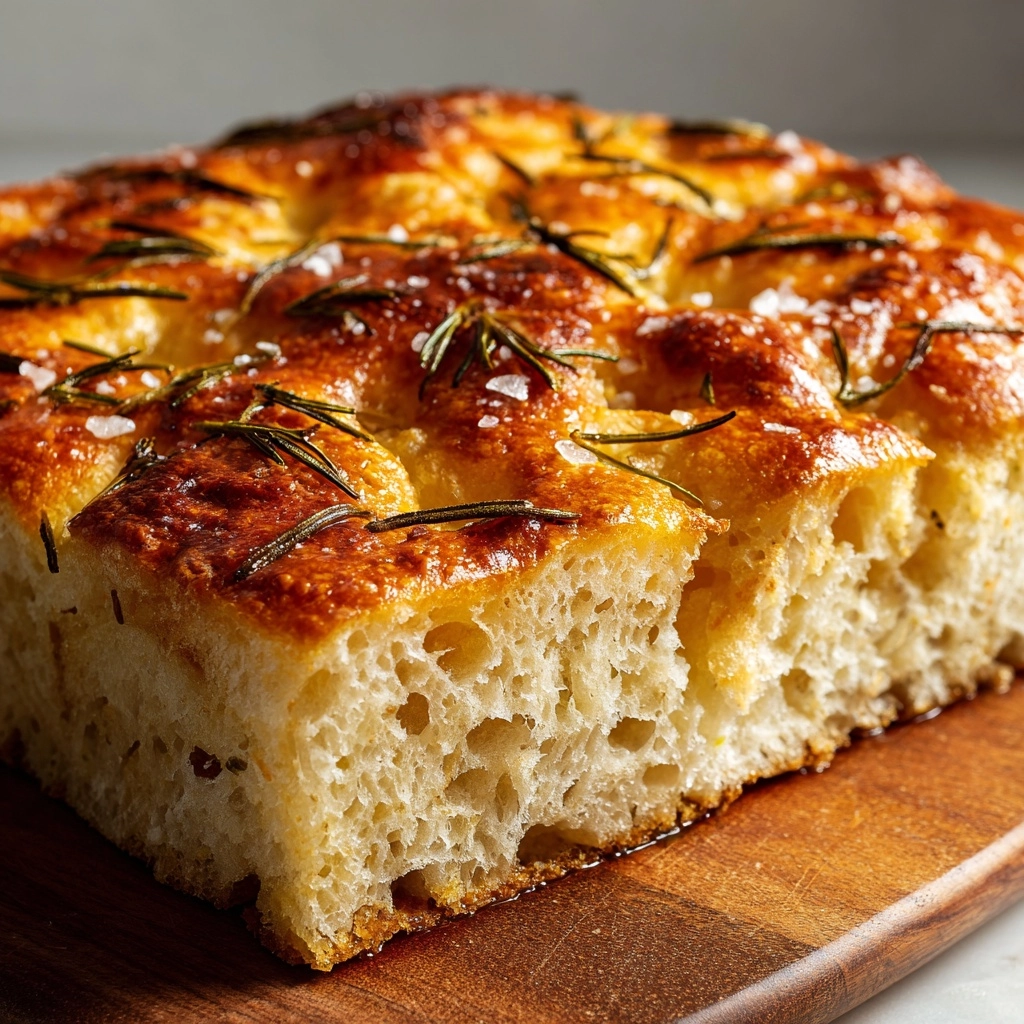
There’s nothing quite like the magic of tearing into a warm, golden-crusted loaf of Rustic No-Knead Rosemary Garlic Bread, its aromatic steam swirling with the unmistakably cozy notes of garlic and rosemary. This recipe is all about inviting you to experience bread-baking at its most approachable and rewarding — no kneading needed! Each bite is a testament to the simplicity of combining good flour, herbs, and just a bit of patience, resulting in a loaf that’s simultaneously rustic, fragrant, and impossibly satisfying.

Ingredients You’ll Need
Part of the charm of this Rustic No-Knead Rosemary Garlic Bread is its short ingredient list, where every element shines. Each chosen ingredient plays a unique role in building the bread’s hearty flavor, unforgettable aroma, and signature crust.
- All-Purpose Flour: The backbone of your bread, it provides structure and chewy texture — use a high-quality brand for the best results.
- Salt: Just enough to expertly season the dough and bring out the flavors of the rosemary and garlic.
- Instant Yeast: A small amount works its magic slowly during the long rise, ensuring a beautiful airy crumb without any kneading.
- Warm Water: Essential for activating the yeast and bringing the dough together — make sure it’s comfortably warm, not hot.
- Fresh Rosemary (chopped): This fresh herb infuses the loaf with its woodsy aroma and vibrant green specks; dried can be used in a pinch.
- Garlic (minced): The heart of this bread, minced raw or roasted garlic melts into the dough for unforgettable flavor in every bite.
- Olive Oil: A splash of olive oil adds richness to the dough and supports the golden, crackly crust.
- Additional Flour for Dusting: Flour your hands and work surface to make shaping the dough a breeze.
- Cornmeal for Dusting (optional): This provides a delightful crunch to the loaf’s bottom if you have some handy.
How to Make Rustic No-Knead Rosemary Garlic Bread
Step 1: Mix the Dry Ingredients
Grab a large mixing bowl and whisk together the flour, salt, and instant yeast. This basic blend sets the stage for your loaf, ensuring every bite is airy yet hearty. You want these ingredients well combined before gently layering in those beautiful flavors.
Step 2: Add Rosemary and Garlic
Sprinkle in the freshly chopped rosemary and minced garlic. Stir them through the flour mixture, making sure the herbal and garlicky bits are evenly distributed — these will be visible in every slice and infuse the dough as it rises.
Step 3: Bring the Dough Together
Pour in the warm water and olive oil. Use a sturdy spoon (or clean hands) to gently mix until a shaggy, sticky dough forms. No need to worry about lumps! The long rise will take care of it and create that miraculous open crumb you’re after.
Step 4: Let the Dough Rise
Cover the bowl tightly with plastic wrap. Set it on your kitchen counter and let the dough rest at room temperature for 12 to 18 hours — yes, really! This slow fermentation lets the yeast develop maximum flavor and creates those signature rustic bubbles.
Step 5: Shape the Dough
Once the surface is bubbly and the dough has doubled in size, flour your work surface and your hands. Gently turn out the dough and use floured fingers to form it into a rough ball. This step is more about gathering the dough than shaping it perfectly.
Step 6: Rest and Preheat
Place the dough ball on a piece of parchment or a floured kitchen towel, then cover loosely with a towel. Let it rest for 30 minutes while you preheat the oven to 450°F, placing your Dutch oven (with the lid) inside so it gets piping hot — this is the trick for that fabulous crust!
Step 7: Bake the Bread
When ready, carefully remove your Dutch oven. Sprinkle the bottom with cornmeal or flour to prevent sticking, then gently transfer the dough inside. Cover and bake for 30 minutes; then, take off the lid and bake 15 to 20 minutes more. You’ll know it’s ready when the crust is gorgeously golden brown.
Step 8: Cool and Slice
Move the baked bread to a wire rack and let it cool before slicing — trust me, the wait is worth it! This step keeps all the steam inside, ensuring a soft, flavorful crumb in your Rustic No-Knead Rosemary Garlic Bread.
How to Serve Rustic No-Knead Rosemary Garlic Bread
Garnishes
Try brushing the warm loaf with a touch more olive oil and a final sprinkle of flaky salt or extra chopped rosemary. For an extra garlic kick, rub a peeled garlic clove over the hot crust, letting it melt in for a subtle zing.
Side Dishes
The versatility of Rustic No-Knead Rosemary Garlic Bread knows no bounds. Serve thick slices alongside a steaming bowl of tomato soup, pair it with a summery salad, or make it the star next to a classic roast or antipasto platter.
Creative Ways to Present
Consider tearing the loaf into rustic chunks for dipping in olive oil and balsamic, or use it as the base for open-faced sandwiches loaded with your favorite toppings. For gatherings, offer slices in a bread basket lined with a colorful cloth for that artisanal bakery vibe.
Make Ahead and Storage
Storing Leftovers
To keep your Rustic No-Knead Rosemary Garlic Bread at its peak, store cooled slices in an airtight container or tightly wrapped in foil at room temperature for up to three days. This helps preserve its chewy texture and those crave-worthy flavors.
Freezing
Freezing is a great way to save extra bread for later. Wrap the cooled loaf or individual slices securely in plastic wrap and place them in a freezer bag; freeze for up to three months. Thaw slices as needed at room temperature or briefly warm them in the oven to revive the crust.
Reheating
For that just-baked experience, reheat slices in a 350°F oven for about 10 minutes, or pop a slice in the toaster for a quick crisp. Bread that’s been frozen may need a minute or two longer, but it will come out fragrant and fresh-tasting every time.
FAQs
Can I use dried rosemary instead of fresh?
Absolutely! If using dried rosemary, reduce the amount to one teaspoon (as dried herbs are more concentrated) to keep the flavor balanced in your Rustic No-Knead Rosemary Garlic Bread.
Is it necessary to use a Dutch oven?
While a Dutch oven is ideal for achieving that crackly crust and perfectly moist interior, you can also bake the bread in any heavy, oven-safe pot with a tight lid. Just be sure it can withstand the high temperature!
What if I want a stronger garlic flavor?
For an intensified garlic kick, try roasting the garlic cloves before adding them to your dough. Roasted garlic brings a sweet, mellow element to your Rustic No-Knead Rosemary Garlic Bread that’s truly irresistible.
Can I add cheese or other herbs?
Absolutely! Chopped chives, thyme, or even a handful of grated parmesan or asiago would add new flavor dimensions. Fold them in with the rosemary and garlic for a delicious twist.
Is this bread vegan?
Yes, this Rustic No-Knead Rosemary Garlic Bread is completely plant-based as written, making it a fantastic choice for anyone following a vegetarian or vegan diet.
Final Thoughts
Baking your own Rustic No-Knead Rosemary Garlic Bread is a seriously rewarding adventure. There’s a special kind of pride that comes from slicing into a golden, aromatic loaf you created with your own hands. Give this recipe a try and let the irresistible scent of rosemary and garlic fill your kitchen — I truly hope it becomes a staple in your bread-baking rotation!