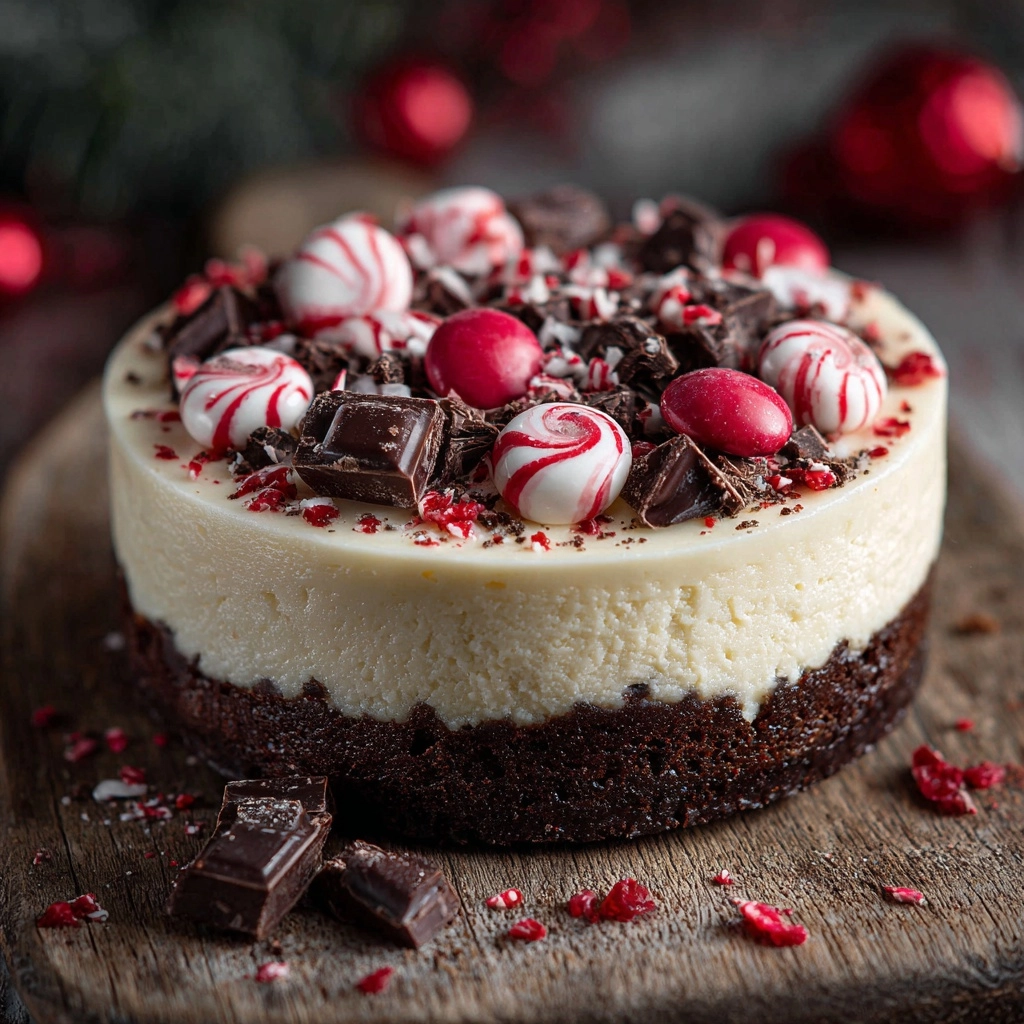
If you’ve ever yearned for a dessert that’s both stunningly festive and delightfully cool, let me introduce you to the Peppermint Ice Cream Cake. This no-bake masterpiece layers chocolate cookies, creamy peppermint ice cream, and fudgy goodness for a decadent treat that tastes as impressive as it looks. Whether you need a showstopper for a holiday dinner or just want a fun twist on classic ice cream cake, this recipe is guaranteed to earn fanfare from your family and friends!
Ingredients You’ll Need
You only need a handful of simple, familiar ingredients to make this Peppermint Ice Cream Cake, but trust me—they all play a starring role in flavor and texture. From the chocolatey cookie base to the cool, minty swirl, each component adds something special Topping everything with a flourish seals the deal!
- Chocolate sandwich cookies: Crushed into bits, these create a satisfyingly crunchy base that anchors every bite.
- Unsalted butter: Melted and mixed with the cookies, it binds the crust together and adds a luscious richness.
- Peppermint ice cream: The star of the show! Choose a quality ice cream—the flecks of peppermint make all the difference for flavor and color.
- Hot fudge sauce: This dreamy, pourable chocolate sauce tucks between layers and drizzles over the top for extra decadence.
- Whipped topping: Light and fluffy, this cloud-like finish makes every bite feel like a celebration.
- Crushed peppermint candies or candy canes: Sprinkle these sweet bits over the top for shimmer, crunch, and classic holiday flavor.
- Chocolate shavings or sprinkles (optional): For a little extra drama and a beautiful finishing touch, scatter these over before serving.
How to Make Peppermint Ice Cream Cake
Step 1: Prepare Your Pan
Start by greasing the bottom of a 9-inch springform pan or lining it with parchment paper. This step ensures your Peppermint Ice Cream Cake will release beautifully when you’re ready to serve, so don’t skip it! Having a springform pan makes slicing neat wedges so much easier, but a standard cake pan can work in a pinch.
Step 2: Build the Chocolate Cookie Crust
In a mixing bowl, combine the crushed chocolate sandwich cookies with melted unsalted butter. Stir well until all the crumbs are evenly coated and the mixture resembles wet sand. Press this firmly into the bottom of your prepared pan—use the back of a spoon or the bottom of a glass for an even finish. Pop this in the freezer for 10 to 15 minutes to set the crust.
Step 3: Add the First Layer of Peppermint Ice Cream
Scoop out half of the softened peppermint ice cream and spread it evenly over the chilled cookie crust. Work quickly so it stays easy to spread but doesn’t melt too much. Once smooth, transfer the pan back to the freezer and let it firm up for about 30 minutes.
Step 4: Add the Fudge Layer
Warm one cup of hot fudge sauce just enough to make it pourable (but not hot). Gently spread the sauce over the chilled ice cream layer, letting it ripple across the surface. Freeze the cake again for 15 minutes to help the fudge layer set and ensure the next ice cream layer stays defined.
Step 5: Spread the Second Layer of Ice Cream
Take the remaining peppermint ice cream and carefully smooth it over the set fudge layer. This creates that irresistible double layer of cool, creamy, minty goodness! Smooth the top as much as possible for a pretty finish. Now, let the whole cake chill out in the freezer for at least 4 hours, or until completely firm.
Step 6: Decorate and Serve
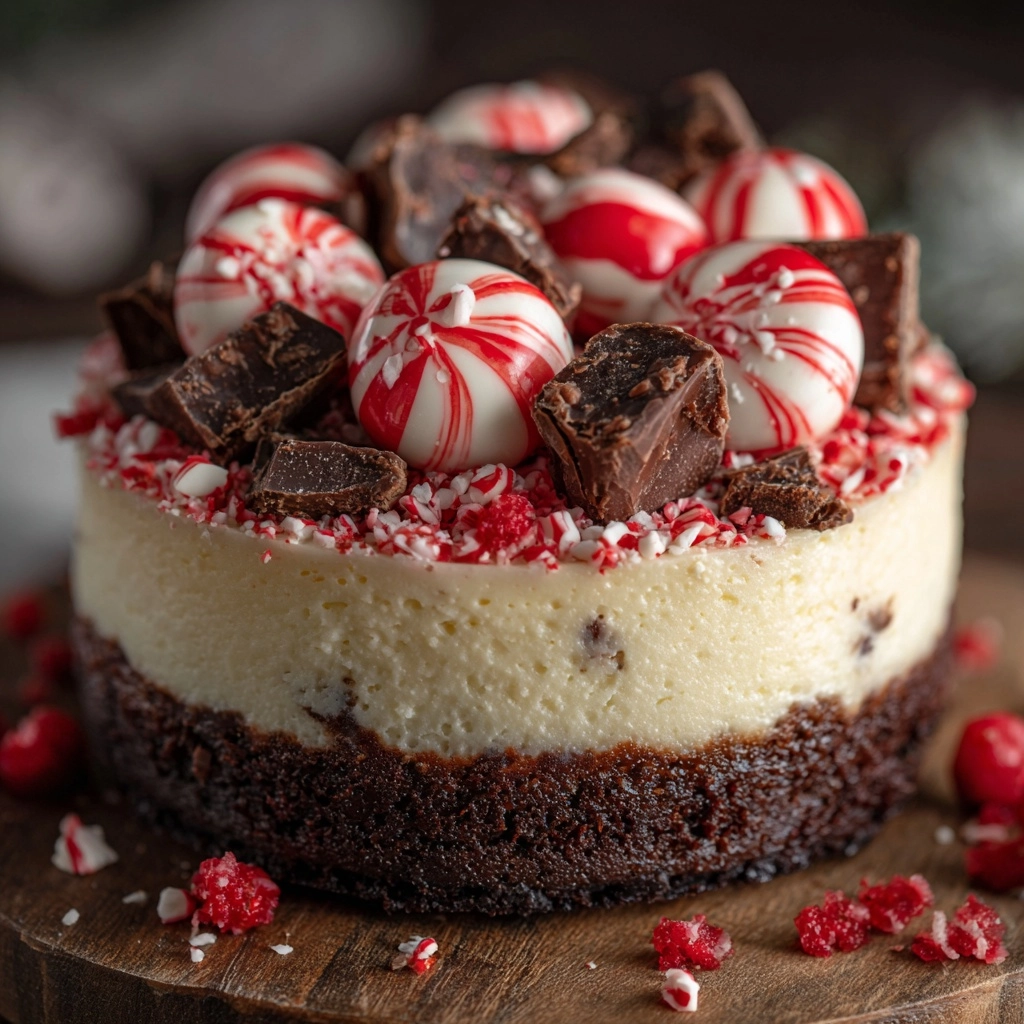
Right before you’re ready to impress your guests, spread the whipped topping over the surface of the Peppermint Ice Cream Cake. Drizzle with the remaining half cup of hot fudge sauce, then scatter on crushed peppermint candies and chocolate shavings or sprinkles if you like a little extra flair. Before slicing, let the cake rest at room temperature for 5 to 10 minutes—this makes it so much easier to cut gorgeous slices!
How to Serve Peppermint Ice Cream Cake
Garnishes
Use plenty of eye-catching garnishes to make your Peppermint Ice Cream Cake a true centerpiece. Try a dramatic swirl of whipped topping, the shine of hot fudge, a sprinkle of crushed peppermint candies, and a dusting of chocolate shavings. These little finishing touches don’t just look pretty—they add irresistible bursts of flavor in each bite.
Side Dishes
Since this cake shines with bright, bold flavors, pair it with mellow, comforting sides—a mug of hot chocolate, a cup of freshly brewed coffee, or even a bowl of simple fresh berries. These balance out the richness of the ice cream and make the experience feel like a true dessert event!
Creative Ways to Present
For a creative twist, slice your Peppermint Ice Cream Cake into slim wedges and layer them in parfait glasses with extra fudge and whipped cream, or cut into squares and stack for a whimsical tower. Individual mini cakes can be made in muffin tins for perfect party portions, and for the holidays, try serving a slice atop a plate drizzled with chocolate and a festive mint leaf.
Make Ahead and Storage
Storing Leftovers
Any leftover Peppermint Ice Cream Cake keeps best when covered tightly with plastic wrap or foil and stashed in the freezer. The key is to prevent freezer burn, so make sure your cake is well protected! It will stay fresh and fabulous for up to 1 week—though it rarely lasts that long in my house.
Freezing
This cake is practically made for freezing, so you can absolutely make it ahead of a special event. Prepare it up to 2 days in advance, keep it well covered, and simply add the whipped topping and garnishes right before serving. The texture stays silky and delicious, so you can focus on having fun rather than last-minute prep.
Reheating
Luckily, there’s no reheating required for Peppermint Ice Cream Cake! If your cake is too firm to slice, let it sit at room temperature for 5 to 10 minutes before serving. This slight thaw brings out the best creamy texture and makes cutting clean, neat slices a breeze.
FAQs
Can I use a different flavor of ice cream?
Absolutely! While peppermint is classic here, you can swap in chocolate, vanilla, or even cookies and cream for a different flavor profile. Just keep the fun of the Peppermint Ice Cream Cake by adding crushed peppermint or festive toppings!
What can I use if I don’t have a springform pan?
You can use a standard 9-inch cake pan lined with parchment, or even make individual cakes in a muffin tin. Just be sure to line with parchment or plastic wrap for easy removal.
Is this Peppermint Ice Cream Cake gluten-free?
It can be! Substitute gluten-free chocolate sandwich cookies in the crust, and check your hot fudge sauce and toppings for any hidden gluten ingredients for a completely gluten-free treat.
Can I make this cake ahead of time?
Definitely. Peppermint Ice Cream Cake actually gets better when made a day in advance, as the flavors have time to meld together. Just wait to add the whipped topping and garnishes until right before serving.
How do I get neat, clean slices?
For picture-perfect slices, dip a sharp knife in warm water and wipe it dry between cuts. Let the cake sit at room temperature for a few minutes before slicing for the smoothest results.
Final Thoughts
If you’re ready to create a chilled dessert that’s as magical to eat as it is to serve, you have to try this Peppermint Ice Cream Cake. Every bite delivers creamy, crunchy, chocolate-mint perfection—so don’t be surprised when everyone comes back for seconds. Go ahead and give it a whirl; your next celebration will thank you!