If you’ve ever wondered how to unlock the rich, mellow goodness hidden inside garlic cloves, you’re about to discover a simple culinary secret with this delightful How to Roast Garlic (2 Ways!) Recipe. Roasting garlic transforms those sharp, pungent bulbs into sweet, buttery gems that elevate any dish with their deep, caramelized flavor. Whether you’re a seasoned home cook or just starting to explore kitchen magic, learning these two roasting methods will open up new possibilities in your meals and bring a cozy warmth to your table.
Ingredients You’ll Need
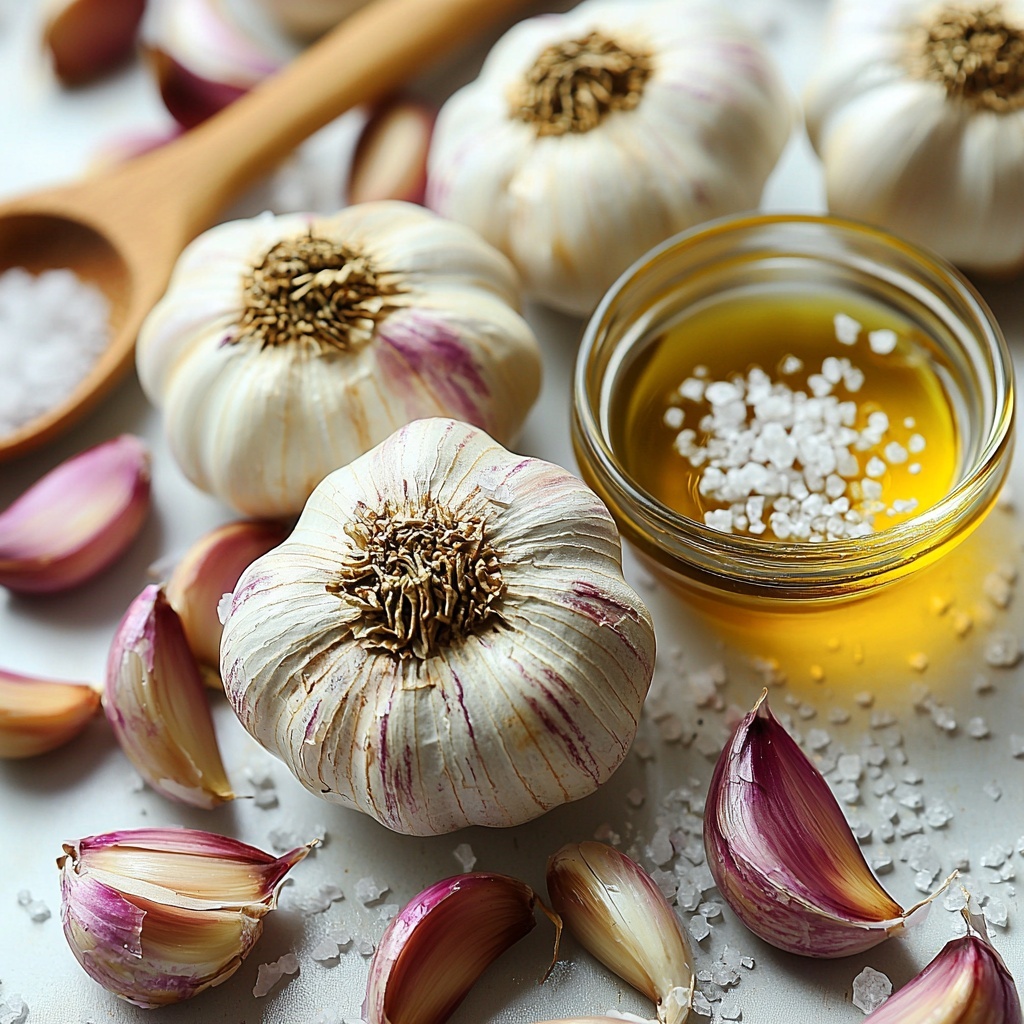
Gathering the right ingredients is a breeze with this recipe. Each item plays a crucial role in coaxing out the garlic’s natural sweetness while adding a touch of savory depth and a beautiful golden touch.
- Garlic heads: Fresh, whole heads of garlic are the star of the show, packed with individual cloves ready to transform.
- Olive or avocado oil: These oils gently coat the garlic, helping it roast evenly and develop that irresistible caramelization.
- Salt: A sprinkle of salt enhances the natural flavors and balances the sweetness after roasting.
How to Make How to Roast Garlic (2 Ways!) Recipe
Step 1: Preparing the Garlic
Start by preheating your oven to 400 degrees Fahrenheit to get it ready for roasting. Peel the garlic heads by removing any excess papery skin without separating the cloves completely. This keeps the head intact so it roasts evenly. Next, slice off the top of the head to fully expose all the individual cloves. If some cloves remain hidden, carefully trim around them so every piece can caramelize during roasting.
Step 2: Adding Oil and Salt
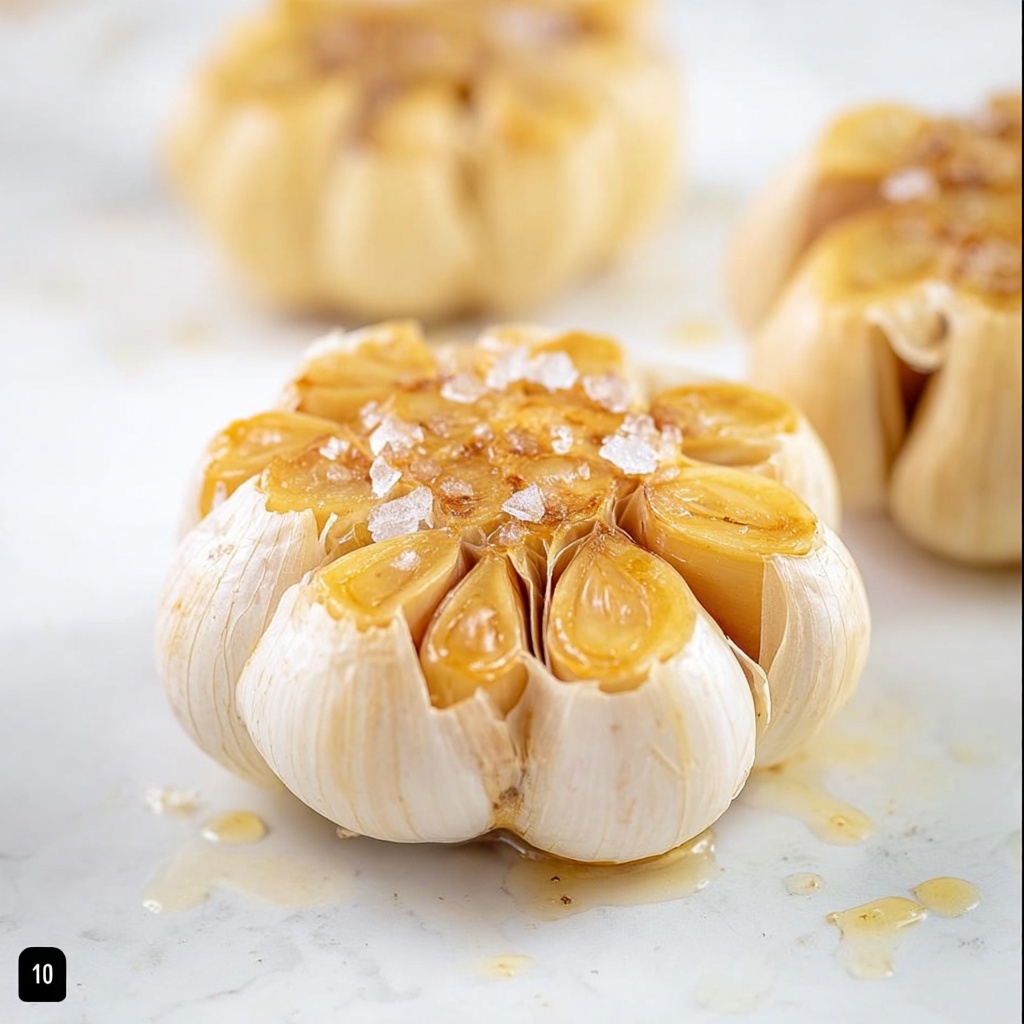
Drizzle about 1 to 2 teaspoons of your chosen oil over each garlic head, making sure to rub it thoroughly into every exposed clove. This step is what helps the garlic roast to a luscious, golden brown. Sprinkle each head lightly with ¼ to ½ teaspoon of salt, which boosts flavor and draws out subtle sweetness as it cooks.
Step 3: Method One – Muffin Pan Roasting
Place the garlic heads cut side up in a muffin or loaf pan. Cover the pan first with parchment paper, then tightly wrap everything with aluminum foil. This setup traps steam, gently roasting the garlic to perfection over 40 to 60 minutes. Keep an eye on the color — once the cloves turn a beautiful caramel color, they’re ready to come out.
Step 4: Method Two – Foil Packet Roasting
Alternatively, wrap each garlic head individually in parchment paper, then in aluminum foil. Arrange these packets on a baking sheet and roast in the oven for the same amount of time. This method gives you easy, mess-free portions that retain delightful moisture and develop an extra depth of flavor inside each foil packet.
Step 5: Cooling and Extracting the Cloves
After roasting, remove the foil and let the garlic cool until it’s safe to handle. Using a small spoon, gently loosen the skin of each clove by twisting it around the rim, then press to pop the soft, sweet roasted garlic out. This easy step means you can get straight to enjoying that melt-in-your-mouth softness.
How to Serve How to Roast Garlic (2 Ways!) Recipe
Garnishes
Roasted garlic is incredibly versatile as a garnish. Smear it onto crusty bread for an instant appetizer or use it to finish soups and sauces with a buttery punch. Its texture and flavor make it perfect for sprinkling over roasted vegetables or mashed potatoes, adding a rich, comforting layer to every bite.
Side Dishes
This roasted garlic is a perfect companion for many side dishes. Mix it into mashed cauliflower or creamy risottos for a subtly sweet note. Or, blend it into compound butters and toss with steamed greens to elevate the simplest plate into something unforgettable.
Creative Ways to Present
Serving roasted garlic whole in its head is a fun, rustic presentation at your next dinner party – guests can squeeze out the cloves themselves. Another creative idea is to fold cloves into warm pasta dishes or whip them into a garlic aioli for sandwiches and grilled meats. The possibilities are endless, and each adds a unique flair to your culinary creations.
Make Ahead and Storage
Storing Leftovers
If you have any roasted garlic left over, you’re in luck. Store it in an airtight container in the refrigerator and enjoy it within 3 to 4 days. Roasted garlic keeps its rich flavor and soft texture beautifully chilled, so you can add it to multiple meals throughout the week without extra effort.
Freezing
To save roasted garlic for even longer, freezing is your friend. Place the cloves in a freezer-safe bag or container, and you can keep them frozen for up to 3 months. When it’s time to use, simply thaw them in the fridge or at room temperature. This makes stocking up super convenient.
Reheating
When reheating, keep it gentle to retain that creamy texture. Warm the garlic in a low oven or microwave for just a few seconds until soft and spreadable. Avoid overheating, as that can dry it out and diminish the luscious flavor you worked so hard to create.
FAQs
Can I roast garlic without oil?
While oil helps the garlic caramelize evenly and prevents drying out, you can roast garlic without it if needed. The cloves will roast but may have a less rich texture and may not caramelize as deeply.
Is it better to roast whole heads or individual cloves?
Roasting whole heads keeps the garlic moist and tender, infusing a milder sweetness. Individual cloves roast quicker but can dry out if not watched carefully. Whole heads are ideal for this recipe’s two roasting methods.
How long does roasted garlic last in the refrigerator?
Properly stored in an airtight container, roasted garlic lasts about 3 to 4 days in the fridge without losing flavor or texture.
Can I use other types of oil besides olive or avocado?
Yes! Mild oils like grapeseed or light vegetable oils can work. However, olive and avocado oil add the best flavor and promote a beautiful caramelization.
What is the best way to use roasted garlic in recipes?
Roasted garlic is fantastic spread on bread, stirred into mashed vegetables, mixed into sauces, or used as a flavor booster for soups and dressings. Its naturally sweet flavor pairs with almost anything savory.
Final Thoughts
I truly believe once you try the How to Roast Garlic (2 Ways!) Recipe, you’ll find yourself reaching for garlic in whole heads more often because of its incredible ease and rewarding flavor. It’s such a beautiful way to deepen your meals and add a touch of homemade magic. Get ready to spread, stir, and savor garlic like never before – your taste buds will thank you!
Print
How to Roast Garlic (2 Ways!) Recipe
- Prep Time: 10 minutes
- Cook Time: 40-60 minutes
- Total Time: 50-70 minutes
- Yield: 15 servings
- Category: Condiment
- Method: Baking
- Cuisine: Universal
- Diet: Gluten Free
Description
This simple and versatile recipe shows you two effective methods to roast garlic until perfectly caramelized and sweet. Roasted garlic enhances a variety of dishes with its mellow flavor, and can be easily incorporated into spreads, sauces, or simply enjoyed on toasted bread.
Ingredients
Ingredients
- 1 or more heads of garlic
- 1–2 teaspoons olive oil or avocado oil per head
- ¼ – ½ teaspoon salt per head
Instructions
- Preparing the Garlic: Preheat your oven to 400°F (204°C). Peel away any loose outer layers of garlic skin from the bulb to expose the cloves, but keep the head intact.
- Cut the Garlic: With a sharp knife, slice off the top of each garlic head to expose the individual cloves. If some cloves remain uncut on the sides, carefully slice around them to ensure even roasting.
- Add Oil and Salt: Drizzle 1-2 teaspoons of olive or avocado oil over each garlic head and gently rub it into the exposed cloves. Sprinkle ¼ to ½ teaspoon of salt over each head to enhance flavor.
- Choose Roasting Method: Method 1 – Place the garlic heads cut side up in a loaf pan, muffin pan, or cake pan, then cover tightly with parchment paper followed by aluminum foil to trap moisture. Method 2 – Wrap each garlic head individually in parchment paper and then wrap again in aluminum foil. Place all foil packets on a baking sheet.
- Bake the Garlic: Roast in the preheated oven for 40 to 60 minutes, or until the garlic cloves are soft, golden, and caramelized.
- Cool the Garlic: Carefully remove the foil and allow the garlic heads to cool until they can be handled safely.
- Remove the Cloves: Use a small spoon to loosen each clove by inserting it around the rim, twisting gently to separate the skin, then push downward to pop out the roasted garlic.
- Serve or Store: Enjoy the roasted garlic immediately on toasted bread, incorporate it into recipes like mashed cauliflower, or transfer to an airtight container and refrigerate for up to 3-4 days.
Notes
- Use avocado oil as a mild-flavored alternative to olive oil if you prefer.
- Roasting times may vary slightly depending on the size of the garlic heads and your oven; check for tenderness after 40 minutes.
- Roasted garlic can be frozen for longer storage if desired.
- Using parchment paper under the foil prevents garlic from sticking and helps retain moisture.
- Be careful when handling hot garlic and foil after roasting to avoid burns.
