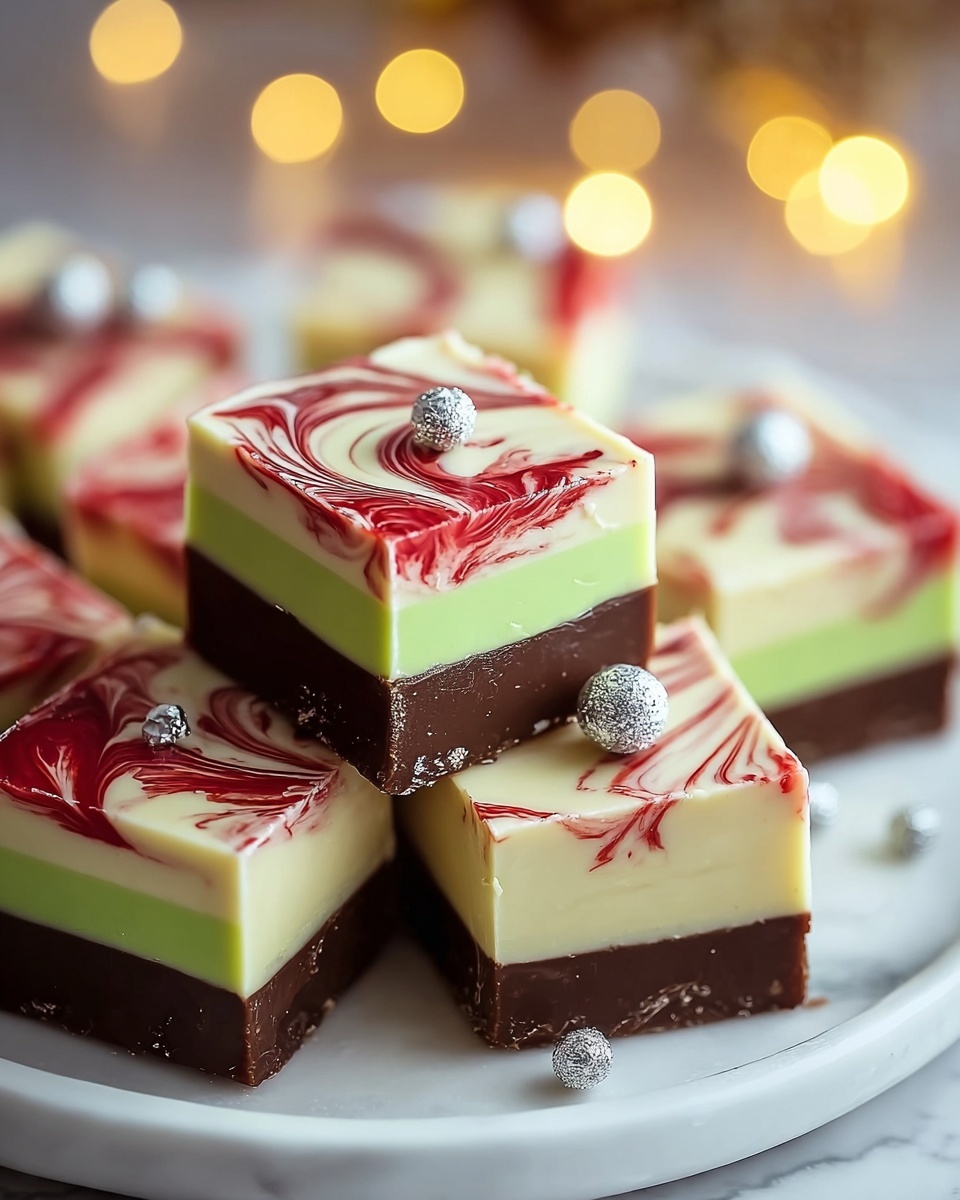
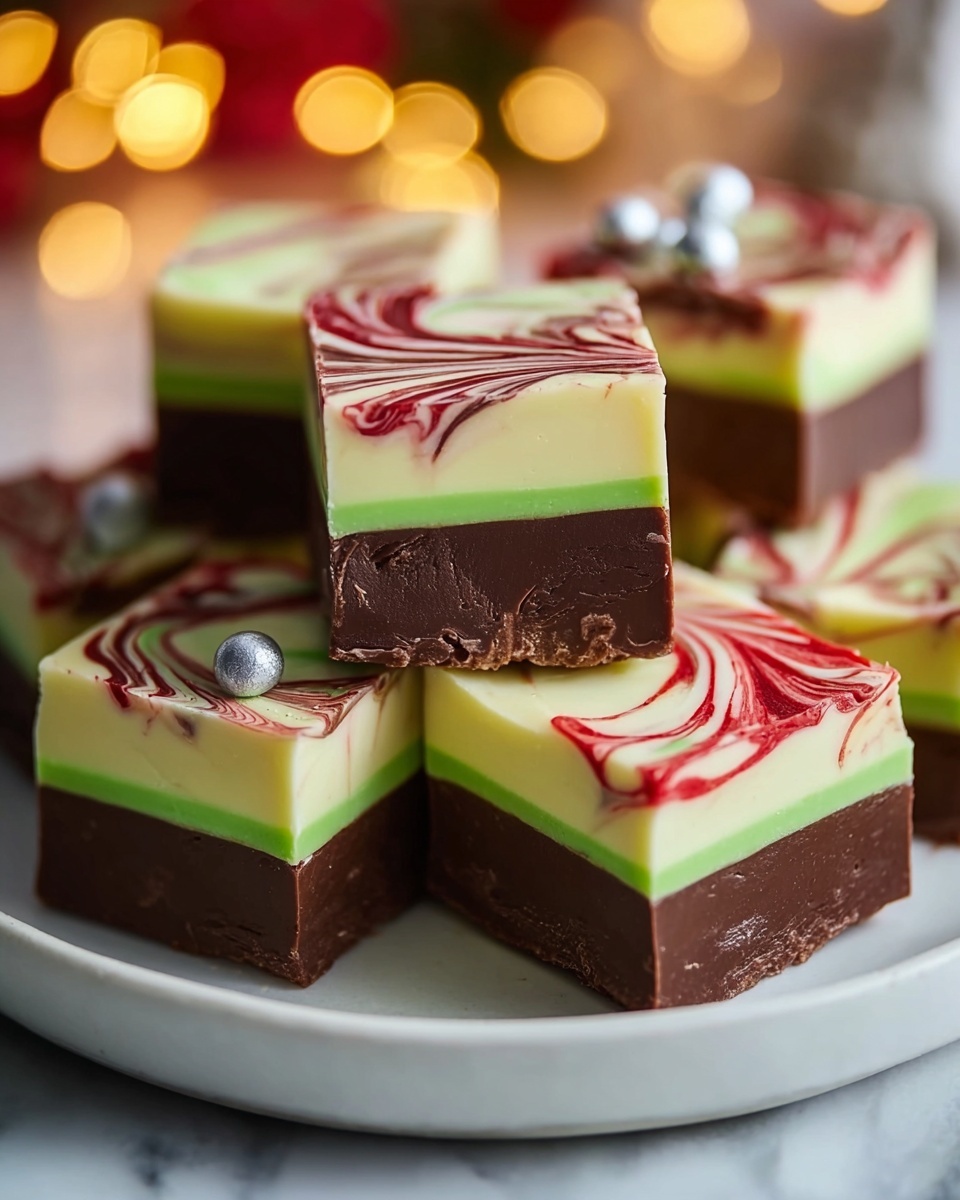
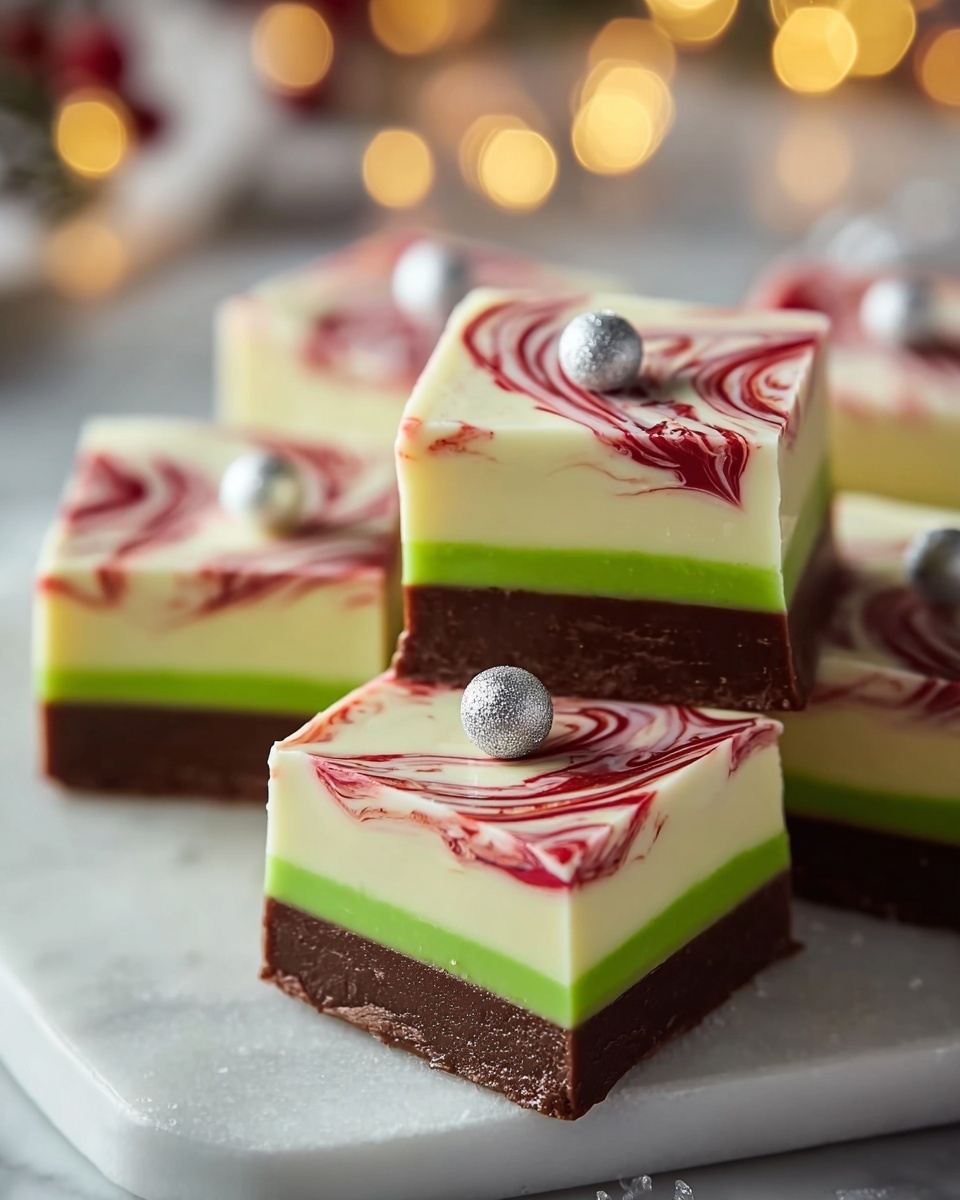
If you’re searching for a delightful holiday treat that’s as fun to make as it is to eat, you’re in for a real festive treat with this Festive Christmas Fudge with Marbled Red and Green Layers Recipe. It’s creamy, sweet, and beautifully swirled with jolly red and green colors that instantly evoke the Christmas spirit. Whether you’re making it for a family gathering, as a handmade gift, or simply to satisfy your holiday sweet tooth, this fudge recipe is a guaranteed crowd-pleaser. The combination of smooth white chocolate and rich sweetened condensed milk, enhanced by the playful marbling effect, makes every bite a cozy celebration of the season. Trust me, once you try it, this recipe will become a treasured staple at your holiday festivities!
Ingredients You’ll Need
Gathering a handful of simple, essential ingredients is all it takes to create magic with this fudge. Each one plays a vital role — white chocolate chips lend creamy sweetness, sweetened condensed milk ensures perfect fudgy softness, while the vanilla extract adds a warm hint of familiar comfort. The red and green food coloring provide that iconic holiday look, turning your kitchen into a festive candy workshop!
- White chocolate chips: Choose good-quality chips for smooth, rich fudge texture and flavor.
- Sweetened condensed milk: This creates the fudgy consistency and adds creamy sweetness that melds perfectly with white chocolate.
- Vanilla extract: Just a touch infuses warmth and depth, enhancing the white chocolate’s flavor.
- Red and green food coloring: Bring the Christmas spirit alive with vibrant holiday hues for the marbled layers.
- Holiday sprinkles (optional): Add festive sparkle and texture on top for extra holiday cheer.
How to Make Festive Christmas Fudge with Marbled Red and Green Layers Recipe
Step 1: Prepare Your Baking Pan
Start by lining an 8×8-inch baking dish with parchment paper. Don’t forget to leave some parchment hanging over the edges—this clever trick makes lifting the fudge out after it sets a breeze.
Step 2: Melt the Chocolate Mixture
In a medium saucepan over low heat, combine your white chocolate chips with sweetened condensed milk. Stir gently but steadily until everything is melted and luxuriously smooth. Remove from the heat and whisk in the vanilla extract to infuse that cozy aroma that feels just like Christmas.
Step 3: Divide and Tint the Mixtures
Pour the melted mixture evenly into three separate bowls. Now is where the festive magic really begins: tint one bowl red, another green, and keep the third plain. This tri-color base will become the beautiful marbled layers that make this fudge truly special.
Step 4: Layer for Marbled Perfection
Pour the red mixture into your prepared pan, spreading it gently but evenly. Next, spoon the plain fudge layer on top. Finally, add the green fudge as your last layer. Using a knife, swirl the layers together with gentle strokes—this melting of colors creates a gorgeous marbled effect that’s as delightful to look at as it is to taste.
Step 5: Add Festive Sprinkles
If you love a little extra sparkle, sprinkle holiday-themed sprinkles on top while the fudge is still slightly warm. They’ll set perfectly into the surface, adding a little texture and festive cheer to every bite.
Step 6: Chill and Set
Place your fudge in the fridge for at least two hours to firm up. When it’s ready, use the parchment paper edges to lift it out of the pan and cut into bite-sized squares. Each piece is a stunning slice of holiday joy!
How to Serve Festive Christmas Fudge with Marbled Red and Green Layers Recipe
Garnishes
To dress up these festive fudge bites, top them with extra sprinkles, crushed peppermint candies, or even a light drizzle of melted chocolate. These little touches make your treats look extra special for holiday guests and family alike.
Side Dishes
This fudge pairs wonderfully with warm drinks like creamy hot cocoa or strong coffee. Serving it alongside cookies, fruitcake, or spiced nuts creates a festive dessert board that invites everyone to nibble and savor the moment together.
Creative Ways to Present
Imagine presenting this fudge in a charming holiday tin, tied with a festive ribbon—perfect for gifting! Or arrange the squares on a decorative platter with sprigs of holly or rosemary for a naturally elegant touch. For parties, try stacking them in clear jars layered with red and green tissue paper to wow your guests visually and delight them taste-wise.
Make Ahead and Storage
Storing Leftovers
Keep your fudge fresh by storing leftover pieces in an airtight container in the refrigerator. It will stay perfectly creamy and ready to enjoy for up to a week—making it a great treat to nibble on throughout the season.
Freezing
You can freeze your fudge to save it for later indulgence. Just wrap it tightly in plastic wrap, then in aluminum foil to protect it from freezer burn. Frozen fudge can keep for up to three months, so you’re all set for unexpected guests or a last-minute holiday craving.
Reheating
Fudge is best enjoyed chilled, but if you prefer it softer, just let it sit out at room temperature for 10 to 15 minutes before serving. Avoid microwaving as it can alter the texture, turning your creamy fudge grainy or too melty.
FAQs
Can I substitute the white chocolate chips with another type of chocolate?
Absolutely! You can swap for semi-sweet or dark chocolate chips for a richer, less sweet fudge, but keep in mind this will change the traditional festive colors and flavors of this particular recipe.
How can I tell when the fudge is perfectly set?
The fudge will be firm to the touch and hold its shape well when cut into squares. If it’s still too soft or sticky, give it more time in the fridge to chill fully.
Is it possible to make this fudge vegan or dairy-free?
Yes! Use vegan white chocolate and a non-dairy sweetened condensed milk alternative to keep the texture smooth and creamy while catering to dietary preferences.
What if I don’t have red and green food coloring on hand?
You can leave the fudge plain and still have a delicious treat, or try natural colorings like beet juice for red and spinach juice for green if you want to keep it festive and naturally colorful.
How do I avoid the fudge sticking to the pan?
Lining your baking dish with parchment paper that extends over the edges is the best way to easily lift out the fudge without any sticking or crumbling—this simple step is a game changer!
Final Thoughts
There’s something truly magical about making and sharing this Festive Christmas Fudge with Marbled Red and Green Layers Recipe during the holidays. It’s a wonderful way to bring a little extra joy and color to your celebrations while creating sweet memories with loved ones. So don your favorite holiday apron, invite friends or family into the kitchen, and get ready to wow everyone with this creamy, colorful, and utterly delicious holiday treat. Happy fudge-making and Merry Christmas!