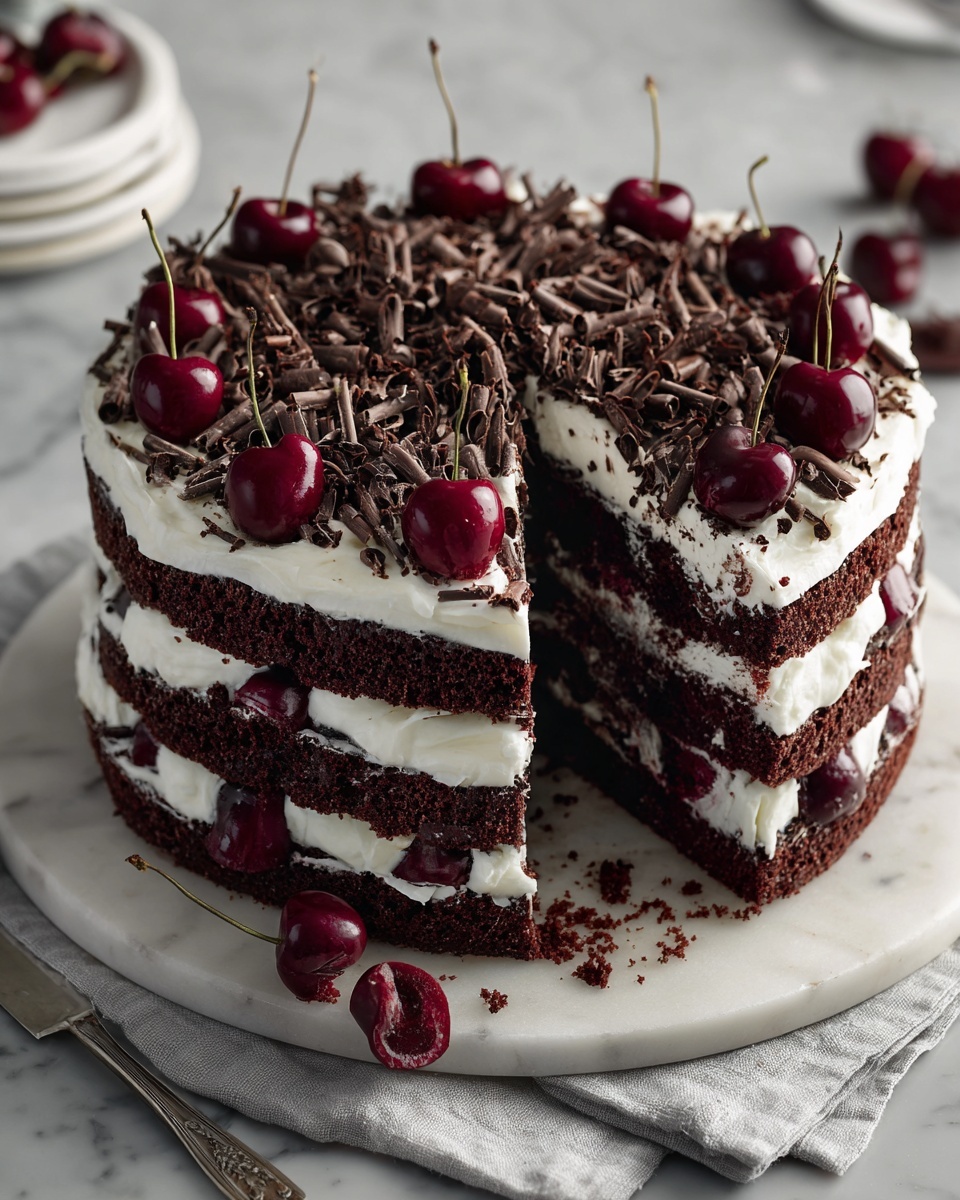
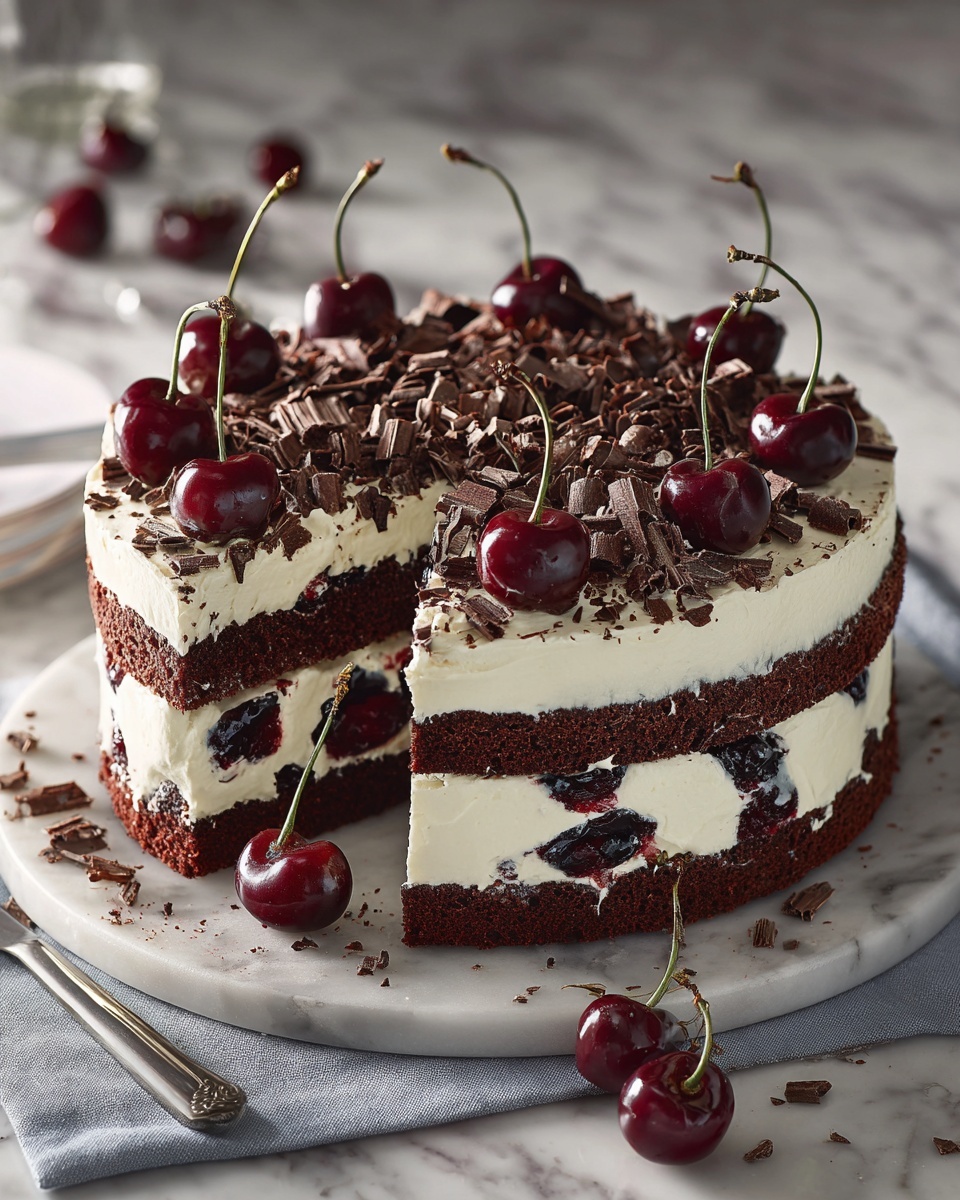
If you have a sweet tooth and love the classic combination of rich chocolate and juicy cherries, you are in for a real treat with this Chocolate & Cherry Delight Recipe. It’s a luscious, moist cake that perfectly balances the deep, intense flavor of cocoa with the bright, tart notes of cherries, making every bite an irresistible indulgence. Whether you’re baking for a special occasion or craving a cozy dessert to share with loved ones, this recipe will quickly become your new favorite.
Ingredients You’ll Need
Gathering simple yet essential ingredients is the first step to creating the magic behind this Chocolate & Cherry Delight Recipe. Each item plays a crucial role—from giving the cake that perfect structure to ensuring the cherry filling bursts with flavor and the whipped cream adds a creamy finish.
- All-purpose flour (1 3/4 cups / 220 g): This forms the base of the cake, giving it that tender crumb.
- Unsweetened cocoa powder (3/4 cup / 75 g): For that deep, rich chocolate taste that defines the recipe.
- Granulated sugar (2 cups / 400 g): Sweetens the cake just right without overpowering the chocolate or cherries.
- Baking powder (2 tsp): Helps the cake rise beautifully for a light texture.
- Baking soda (1/2 tsp): Works with the baking powder to give the cake lift and softness.
- Salt (1/2 tsp): Balances flavors and enhances the chocolate’s richness.
- Large eggs (2): Bind everything together while adding richness.
- Whole milk (1 cup / 240 ml): Adds moisture and tenderness.
- Vegetable oil (1/2 cup / 120 ml): Keeps the cake moist and soft even after baking.
- Vanilla extract (2 tsp): Adds a warm, inviting aroma and depth to the cake batter.
- Boiling water (1 cup / 240 ml): Intensifies the cocoa flavor and brings the batter together.
- Fresh or frozen cherries (2 cups / 320 g), pitted: The star ingredient, providing juicy bursts of fruity flavor. Alternatively, canned cherry pie filling can be used.
- Granulated sugar (1/4 cup / 50 g): Used with fresh or frozen cherries to sweeten the filling.
- Cornstarch (2 tbsp): Thickens the cherry filling to a perfect consistency.
- Water (1/4 cup / 60 ml): Helps dissolve the cornstarch for smooth cherry filling.
- Heavy whipping cream (2 cups / 480 ml): Whipped to soft peaks for a rich topping.
- Powdered sugar (1/4 cup / 30 g): Sweetens the whipped cream just right.
- Vanilla extract (1 tsp): Flavor enhancer for the whipped cream.
- Chocolate shavings or curls: Adds a decorative and delicious finishing touch.
- Fresh cherries: For garnish that looks as gorgeous as it tastes.
How to Make Chocolate & Cherry Delight Recipe
Step 1: Preparing the Cherry Filling
If you’re using fresh or frozen cherries, start by combining them with 1/4 cup sugar, cornstarch, and water in a saucepan. Cook over medium heat, stirring frequently until thickened and bubbling. This luscious cherry filling provides the perfect tart contrast to the chocolate cake. If you opt for canned cherry pie filling, you can skip this step and move right to assembling.
Step 2: Mixing the Dry Ingredients
In a large bowl, whisk together the flour, cocoa powder, granulated sugar, baking powder, baking soda, and salt. This combination ensures your cake has that velvety chocolate taste and the ideal crumb texture. Be sure to sift or whisk well to avoid any lumps for a silky batter.
Step 3: Adding Wet Ingredients
Next, add the eggs, whole milk, vegetable oil, and vanilla extract to the dry ingredients. Mix until the batter is smooth and creamy. The eggs add richness and structure, while oil keeps the cake moist, and vanilla brings out all the flavors splendidly.
Step 4: Incorporating Boiling Water
Slowly stir in the boiling water and watch the batter become beautifully thin. This step intensifies the chocolate flavor and ensures the cake will bake to a tender, moist perfection that melts in your mouth.
Step 5: Baking the Cake
Divide the batter evenly between two greased and floured 9-inch round pans. Bake at 350°F (175°C) for 30 to 35 minutes or until a toothpick inserted into the center comes out clean. Let the cakes cool completely on a wire rack before assembly.
Step 6: Whipping the Cream
While the cake cools, whip the heavy cream with powdered sugar and vanilla extract until soft peaks form. This whipped cream layer will add an airy, creamy balance to the rich cake and bright cherry filling.
Step 7: Assembling the Chocolate & Cherry Delight Recipe
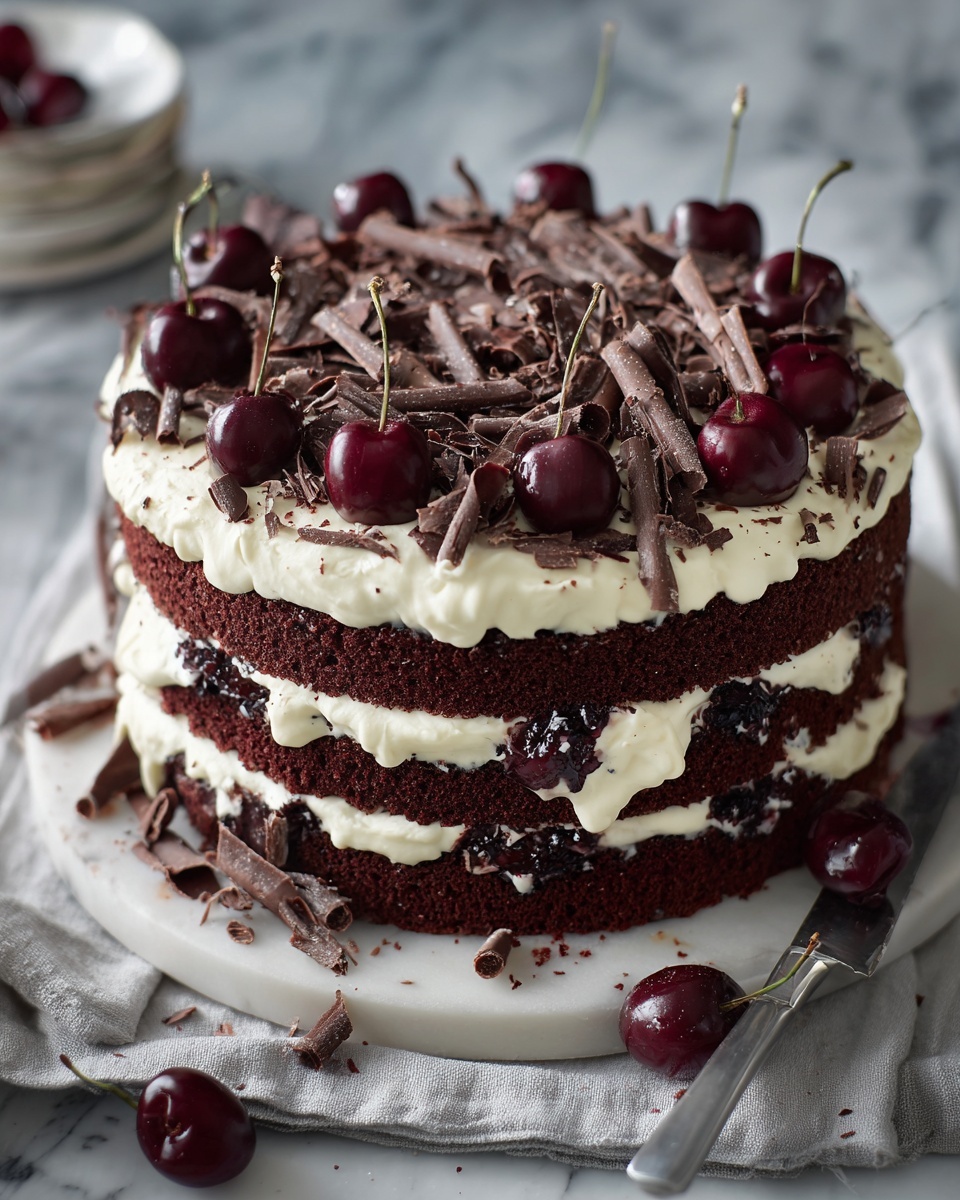
Once cooled, place one cake layer on your serving plate. Spread half of the cherry filling over it, followed by a generous layer of whipped cream. Add the second cake layer on top, then repeat the cherry filling and whipped cream layers. Finish with more whipped cream to cover the top and sides evenly.
Step 8: Decorating Your Delight
Sprinkle chocolate shavings or curls across the top and garnish with fresh cherries for that stunning, classic look that makes this dessert hard to resist.
Step 9: Chilling Before Serving
Refrigerate your Chocolate & Cherry Delight Recipe for at least 2 hours before serving. This chilling step allows the flavors to meld wonderfully and the whipped cream to set perfectly.
How to Serve Chocolate & Cherry Delight Recipe
Garnishes
Fresh cherries and chocolate curls aren’t just for show—they add a burst of juicy sweetness and a delightful crunch that complement the smooth cream and rich cake. Feel free to sprinkle some powdered sugar or add a mint leaf for a fresh twist.
Side Dishes
This dessert pairs beautifully with a scoop of vanilla ice cream or a simple raspberry coulis drizzle. A strong cup of coffee or black tea also works wonders to balance the richness.
Creative Ways to Present
For a fancy touch, serve slices in elegant glass parfait cups layered with extra cherries and whipped cream on top. Or transform it into cupcakes by using the cake batter in muffin tins, topping each with cherry filling and whipped cream swirls.
Make Ahead and Storage
Storing Leftovers
Keep any leftover Chocolate & Cherry Delight Recipe covered in the refrigerator for up to 3 days. The flavors meld even more beautifully overnight, making it taste even better the next day.
Freezing
This dessert freezes well if assembled without the whipped cream topping. Wrap the cake layers and cherry filling separately in plastic wrap and freeze for up to 2 months. Thaw completely in the refrigerator before assembling and frosting.
Reheating
Since this is a chilled dessert, it’s best enjoyed cold. If you prefer a warmer bite, remove a slice from the fridge and let it sit at room temperature for 15-20 minutes before serving. Avoid microwaving as it can alter texture and melt the whipped cream.
FAQs
Can I use frozen cherries for the filling?
Absolutely! Just be sure to thaw them first and drain excess juice if you want a thicker filling. Cook them as directed for the best flavor and texture.
Is there a substitute for vegetable oil?
You can use melted butter or a mild-flavored oil like canola if desired, but vegetable oil keeps the cake extra moist without adding heavy flavor.
Can I make this recipe gluten-free?
Yes, by substituting the all-purpose flour with a gluten-free baking mix suitable for cakes, you can enjoy this dessert without gluten. Just make sure your cocoa powder and other ingredients are gluten-free as well.
What if I don’t have cocoa powder? Can I use melted chocolate instead?
Cocoa powder is preferred because it provides a dry, concentrated chocolate flavor and affects the cake’s texture. If you only have chocolate, melting and adding it might work but will change the batter’s consistency, so adjustments would be needed.
How long does it take to whip the cream properly?
Whipping cream usually takes about 3-5 minutes with an electric mixer on medium-high speed. Stop once soft peaks form for the perfect texture—over-whipping can quickly turn it into butter!
Final Thoughts
This Chocolate & Cherry Delight Recipe is a celebration of two beloved flavors that come together so beautifully in every luscious bite. It’s a fantastic dessert to brighten any gathering or to simply treat yourself to something special. Trust me, once you try it, you’ll find yourself reaching for this recipe time and time again. So preheat your oven and get ready to enjoy this delicious indulgence with your friends and family!