
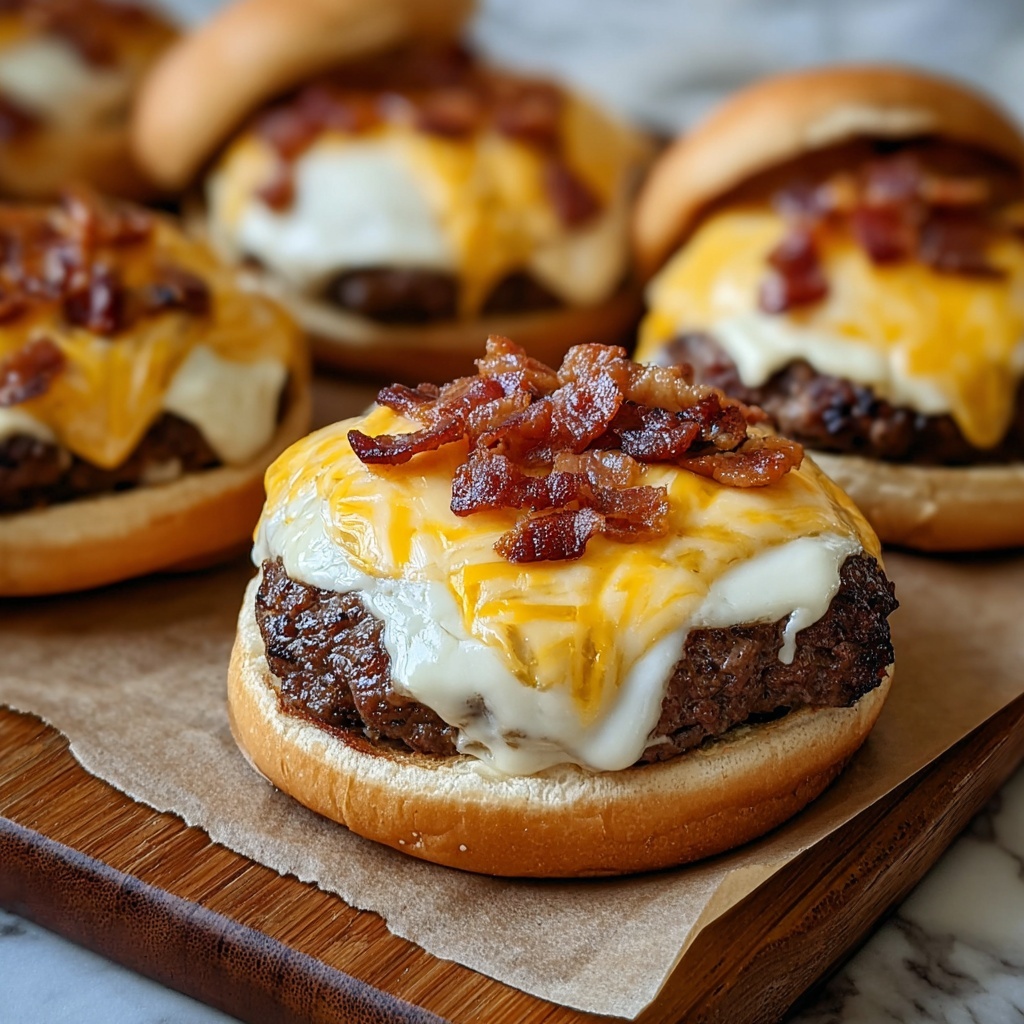
If you are craving a fun, indulgent treat that combines all the best parts of a classic burger wrapped in a golden, flaky shell, then you absolutely must try this Beef Bacon Cheeseburger Bombs Recipe. These little pockets of meaty, cheesy goodness are packed with savory ground beef, crispy bacon, melty cheddar, and just the right touch of ketchup and mustard, all enclosed in pillowy biscuit dough. It’s an exciting twist on a beloved comfort food that’s perfect for game days, parties, or simply satisfying your burger craving with a creative spin.

Ingredients You’ll Need
These ingredients are straightforward but play crucial roles in building the perfect flavor and texture for the Beef Bacon Cheeseburger Bombs Recipe. Each component, from the seasoned ground beef to the flaky biscuit dough, works together to create a mouthwatering experience that’s both hearty and fun.
- 1 lb (450g) ground beef: The savory base that brings juicy burger flavor to every bite.
- 8 slices cooked bacon, chopped: Adds crispy, smoky accents that elevate the meaty filling.
- 1 cup shredded cheddar cheese (or cheese cubes): For melty richness that ties the filling together.
- 1 small onion, finely diced: Provides sweetness and texture that complements the beef.
- 1 tbsp ketchup: Brings tangy sweetness reminiscent of classic burger sauce.
- 1 tbsp mustard (yellow or Dijon): Adds a subtle zing that brightens the filling.
- Salt and pepper, to taste: Essential seasoning to enhance all the flavors.
- 1 tube refrigerated biscuit dough (8 pieces): Creates the fluffy, golden casing that encloses the filling perfectly.
- 1 egg, beaten (for egg wash): Gives the biscuit dough a beautiful, shiny golden crust.
- Optional: sesame seeds for topping: Adds a crunchy, nutty finish and visual appeal.
How to Make Beef Bacon Cheeseburger Bombs Recipe
Step 1: Preheat and Prepare
Begin by setting your oven to 375°F (190°C) and lining a baking sheet with parchment paper. This simple step ensures that your bombs will bake evenly and come off the tray effortlessly once they’re done.
Step 2: Brown the Beef
In a skillet over medium heat, cook the ground beef for about 5 to 7 minutes until it’s nicely browned. Browning adds deep flavor layers that are essential to the filling. After cooking, be sure to drain any excess fat to keep the bombs from becoming greasy.
Step 3: Build the Filling
Add finely diced onions, ketchup, mustard, salt, and pepper directly to the skillet. Let everything cook together for another 3 to 4 minutes so those lovely flavors meld and the onions soften just enough. This step is the secret to that authentic cheeseburger taste.
Step 4: Mix in Bacon and Cool
Fold in the chopped cooked bacon for that irresistible smoky crunch. Then, remove the skillet from heat and allow the filling to cool slightly. Cooling a bit prevents the biscuit dough from getting soggy and helps with easier assembly.
Step 5: Prepare the Biscuit Dough
Flatten each piece of refrigerated biscuit dough into a round shape. This will serve as the vessel for our delicious filling, so aim for an even thickness that can wrap around the meat and cheese comfortably.
Step 6: Assemble the Bombs
Carefully spoon a generous amount of the beef mixture into the center of each dough round. Top the filling with shredded cheddar cheese, making sure you get plenty of cheesiness in each bomb.
Step 7: Seal Them Up
Gently fold the dough around the filling, pinching the edges to form tight little balls. Sealing tightly is important so the cheese doesn’t leak out during baking and all that wonderful goodness stays inside.
Step 8: Add Final Touches
Place each sealed bomb seam-side down on the prepared baking sheet. Brush the tops lightly with the beaten egg for a gorgeous golden finish, and sprinkle sesame seeds on top if you’re feeling fancy and want to add a little extra texture.
Step 9: Bake to Perfection
Pop your bombs into the oven and bake for 15 to 18 minutes, or until they turn golden brown and irresistible. Give them a few minutes to cool once out of the oven so you don’t burn your fingers when you dig into that cheesy center.
How to Serve Beef Bacon Cheeseburger Bombs Recipe
Garnishes
The best part about these bombs is how adaptable they are to your personal tastes. A sprinkle of fresh chopped parsley or some sliced green onions on top can add a pop of color and a fresh bite that balances all that richness beautifully.
Side Dishes
Serve with crispy fries or a colorful side salad for a full meal that pleases any crowd. A tangy coleslaw or pickled veggies can also be fantastic companions to cut through the savory flavors and add some crispness.
Creative Ways to Present
For parties, arrange your Beef Bacon Cheeseburger Bombs Recipe on a wooden board with little bowls of ketchup, mustard, and pickles for dipping. You can also serve them with sliders sized buns as unexpected mini burgers or chop them up for a fantastic party appetizer.
Make Ahead and Storage
Storing Leftovers
If you find yourself with extra bombs, store them in an airtight container in the refrigerator. They will stay delicious for up to 3 days, making for easy snacks or quick lunches the next day.
Freezing
You can freeze these bombs fully assembled but unbaked by placing them on a tray to freeze individually, then transferring them to a freezer-safe bag or container. They will keep well for up to 2 months, allowing you to enjoy them any time a craving strikes.
Reheating
To reheat, pop the bombs in a preheated oven at 350°F (175°C) for about 10 minutes or until warmed through and crisp on the outside. Avoid microwaving if you want to keep that beautiful flaky texture intact.
FAQs
Can I use different cheeses in this recipe?
Absolutely! While cheddar is classic and melts beautifully, you can switch it up with Monterey Jack, mozzarella, or even spicy pepper jack for a fun twist on the original Beef Bacon Cheeseburger Bombs Recipe.
Is there a vegetarian version of this recipe?
Yes, you can substitute the ground beef and bacon with plant-based alternatives or finely chopped mushrooms and smoked tempeh to get a similar smoky, meaty flavor while keeping it meat-free.
Can I make these gluten-free?
To make gluten-free bombs, use gluten-free biscuit dough or puff pastry. Just be sure to check all your ingredients for hidden gluten to keep it completely safe!
What’s the best way to prevent the dough from getting soggy?
Allow the filling to cool slightly before assembling and make sure to seal the dough edges tightly. Brushing with egg wash also helps create a protective crust to lock in all the delicious juices.
Can I prepare these in advance for a party?
Definitely! You can assemble the bombs earlier in the day, refrigerate them, and bake them just before serving to have hot, fresh bites ready to wow your guests.
Final Thoughts
This Beef Bacon Cheeseburger Bombs Recipe is one of those rare dishes that instantly excites everyone at the table. With its perfect blend of flavors, satisfying textures, and fun presentation, it’s sure to become a favorite in your recipe collection. I can’t wait for you to try making these and enjoy the delicious explosion of cheeseburger goodness in every bite.
Print
Beef Bacon Cheeseburger Bombs Recipe
- Prep Time: 10 minutes
- Cook Time: 18 minutes
- Total Time: 28 minutes
- Yield: 8 bombs
- Category: Appetizer
- Method: Baking
- Cuisine: American
Description
These Beef Bacon Cheeseburger Bombs are a delicious and hearty snack or appetizer, combining seasoned ground beef, crispy bacon, and melty cheddar cheese all wrapped in buttery biscuit dough. Perfectly baked until golden and topped with a shiny egg wash and optional sesame seeds, these savory bombs are bursting with classic cheeseburger flavors in every bite.
Ingredients
Beef Mixture
- 1 lb (450g) ground beef
- 8 slices cooked bacon, chopped
- 1 small onion, finely diced
- 1 tbsp ketchup
- 1 tbsp mustard (yellow or Dijon)
- Salt and pepper, to taste
Cheese
- 1 cup shredded cheddar cheese (or cheese cubes)
Dough & Toppings
- 1 tube refrigerated biscuit dough (8 pieces)
- 1 egg, beaten (for egg wash)
- Optional: sesame seeds for topping
Instructions
- Preheat Oven: Preheat your oven to 375°F (190°C) and line a baking sheet with parchment paper to prevent sticking and for easy cleanup.
- Cook Beef: In a skillet over medium heat, brown the ground beef for 5–7 minutes until fully cooked, then drain any excess fat for a leaner filling.
- Add Flavorings: Stir in the finely diced onions, ketchup, mustard, salt, and pepper. Cook the mixture for another 3–4 minutes to meld the flavors and soften the onions.
- Add Bacon: Mix the chopped cooked bacon into the beef mixture, then remove the skillet from heat and allow the filling to cool slightly before assembling.
- Prepare Dough: Flatten each biscuit dough piece into a round shape to create a base for the filling.
- Fill Bombs: Spoon a portion of the beef mixture and some shredded or cubed cheddar cheese into the center of each dough round.
- Seal Bombs: Carefully fold and seal the dough around the filling to form balls, ensuring the seams are tightly closed to prevent leakage while baking.
- Prepare for Baking: Place each dough ball seam-side down on the prepared baking sheet. Brush the tops with beaten egg to give a glossy finish and sprinkle with sesame seeds if desired.
- Bake: Bake in the preheated oven for 15–18 minutes, or until the biscuit dough turns a beautiful golden brown. Remove from oven and let cool slightly before serving to allow cheese to set.
Notes
- Make sure to drain excess fat after browning the beef to avoid greasy filling.
- Let the beef mixture cool slightly before assembling to prevent dough from becoming too sticky or tearing.
- Sealing the dough well is key to avoid filling leakage during baking.
- You can use shredded cheese or small cubes depending on your preference for melty pockets inside the bombs.
- These can be served as an appetizer, snack, or even a fun main dish alongside a salad.


