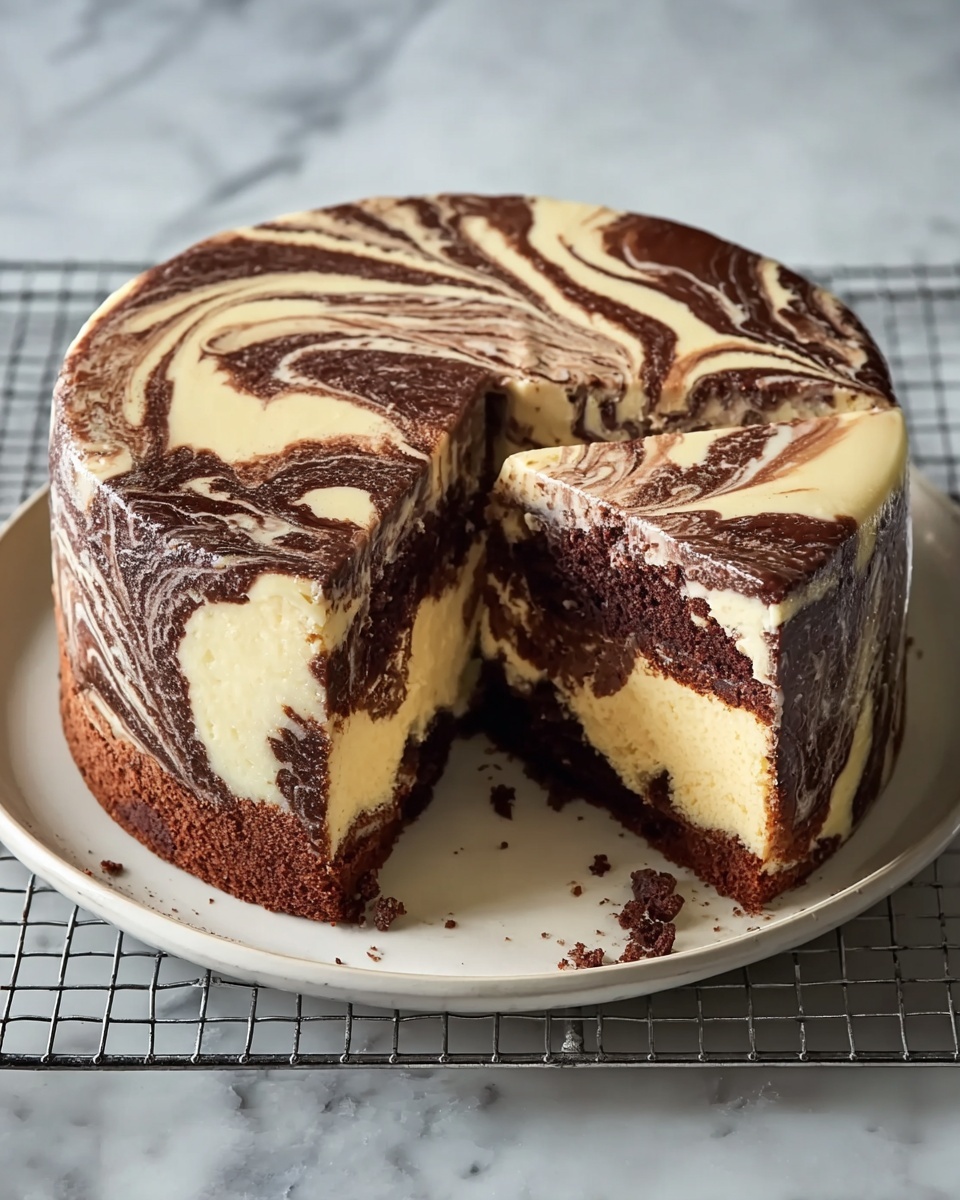
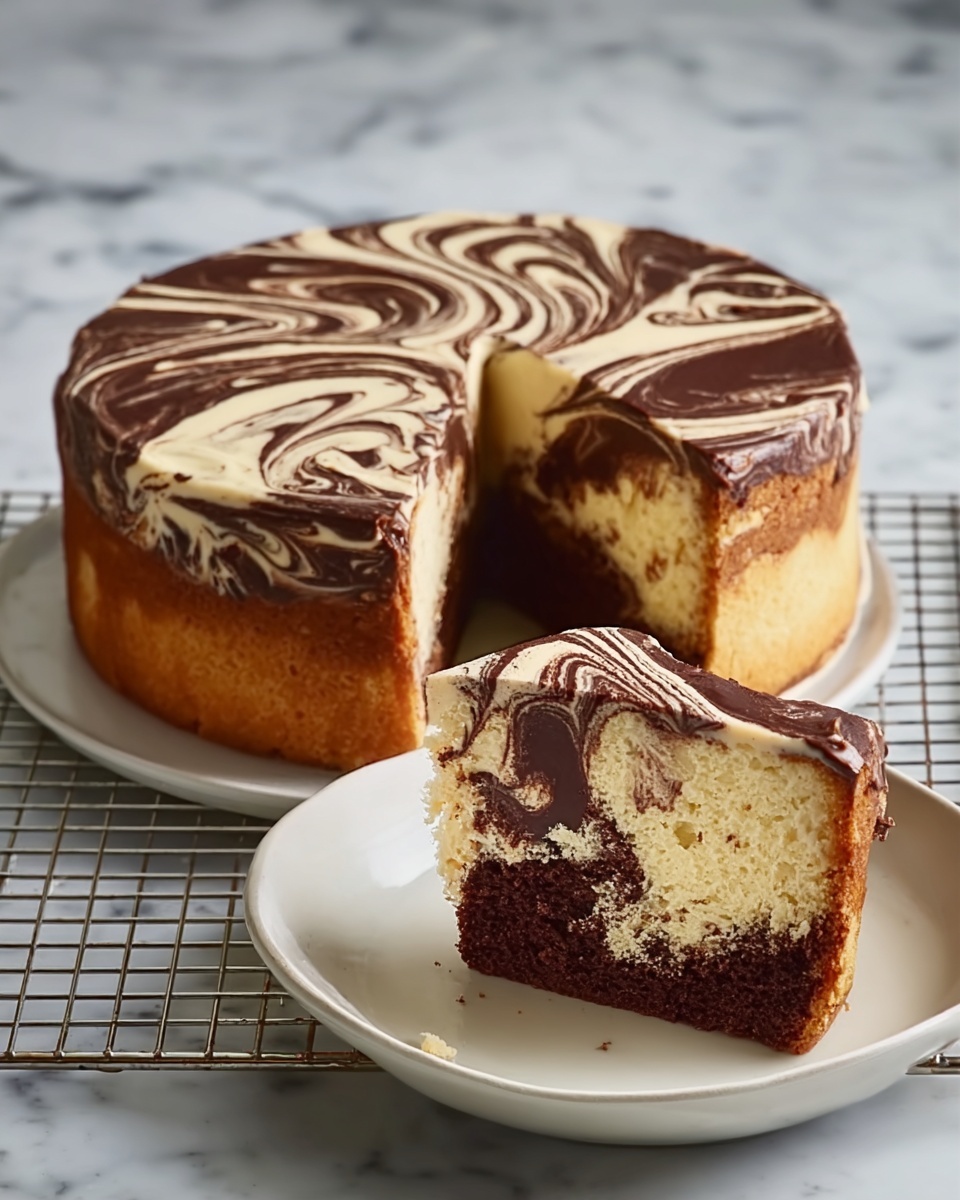
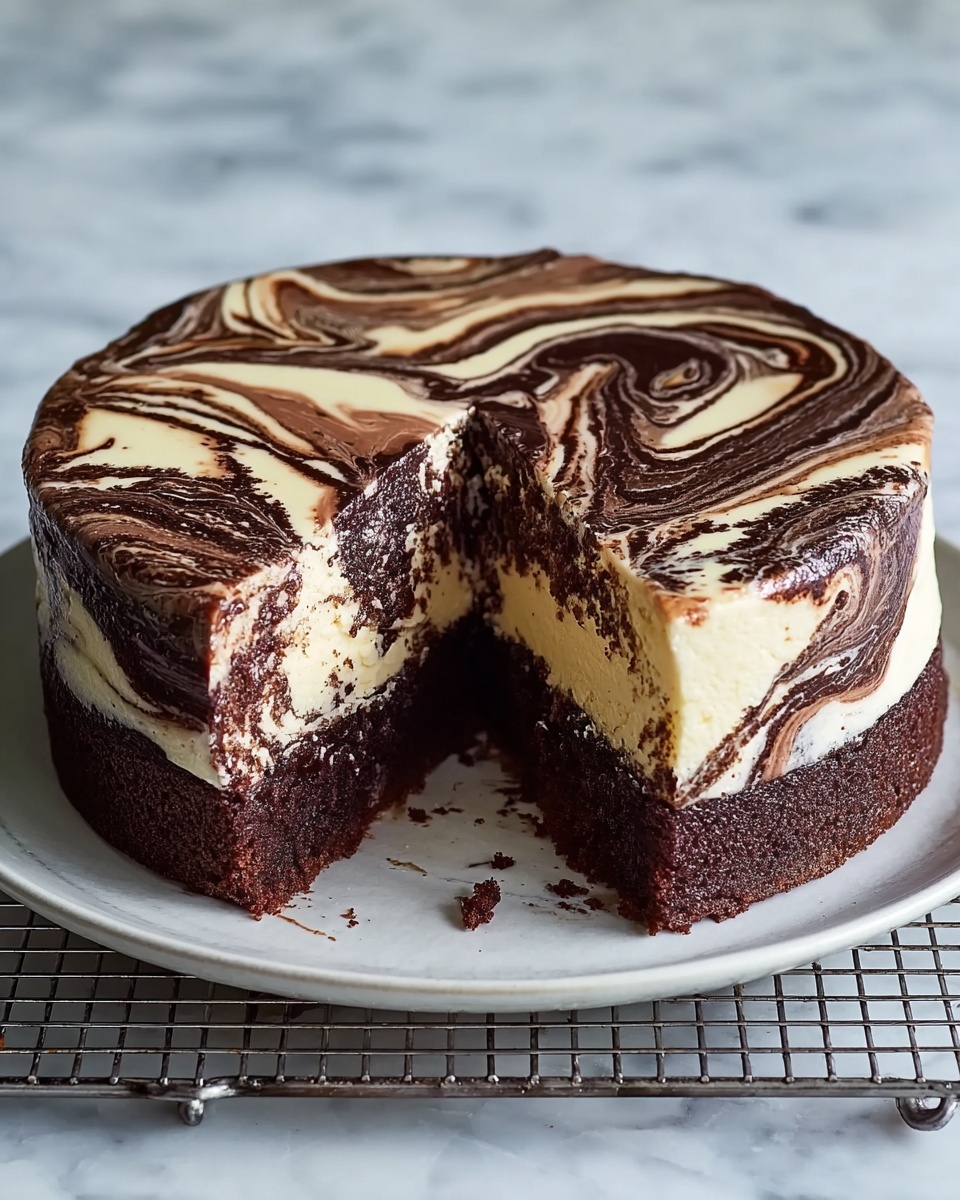
If you have a sweet tooth and adore the nostalgic charm of a homemade dessert, then this Classic Marble Cake Recipe is just what you need in your baking repertoire. This gorgeous cake marries moist, tender vanilla batter with swirls of rich chocolate, creating a stunning marbled effect that tastes as delightful as it looks. Whether for a casual afternoon treat or a special occasion, this cake offers the perfect balance of flavors and a soft, lovely crumb that will make everyone ask for seconds.
Ingredients You’ll Need
Each ingredient in this recipe is simple yet crucial, contributing to the texture, flavor, and beautiful contrast that define a perfect marble cake. From the creamy butter that adds tenderness to the cocoa powder that delivers that irresistible chocolate note, every element works in harmony to create magic in your baking pan.
- 2 cups all-purpose flour: Provides the structure for a light, tender crumb.
- 1 cup white sugar: Sweetens the cake beautifully without overpowering.
- 1 cup milk: Adds moisture and helps keep the cake soft.
- 2 large eggs: Bind everything together while adding richness.
- ½ cup butter, softened: Infuses the cake with a silky texture and buttery flavor.
- 2 teaspoons baking powder: Ensures the cake rises nicely for a fluffy texture.
- 1 teaspoon vanilla extract: Amplifies the warm, sweet notes in the vanilla batter.
- ½ teaspoon salt: Balances the sweetness and enhances overall flavor.
- 2 tablespoons unsweetened cocoa powder: Adds deep chocolate flavor and creates those signature swirls.
How to Make Classic Marble Cake Recipe
Step 1: Prepare Your Oven and Pan
Start by preheating your oven to 350 degrees F (175 degrees C). Greasing and lightly flouring a 9-inch round pan is important to keep your cake from sticking, ensuring it comes out smoothly when it’s time to serve.
Step 2: Combine the Ingredients
In a large bowl, toss together the flour, sugar, milk, eggs, softened butter, baking powder, vanilla extract, and salt. This mixture might look simple now, but it’s the base of an incredible cake!
Step 3: Mix Until Smooth
First, mix slowly just until everything is moistened. Then crank up your electric mixer to medium speed and beat the batter for about 2 minutes until it’s perfectly smooth and lump-free. This step ensures the cake bakes evenly and feels delightfully tender.
Step 4: Separate the Batter
Set aside about ¾ cup of the batter to turn into the chocolate portion. Pour the remaining batter gently into your prepared cake pan to form the vanilla base.
Step 5: Add Cocoa to the Reserved Batter
Now the fun begins! Stir the cocoa powder into the reserved batter until it’s a rich, even chocolate color. This creates the beautiful dark swirls that contrast with the creamy vanilla.
Step 6: Create the Marble Effect
Drop spoonfuls of the chocolate batter over the vanilla batter in the pan. Take a knife and gently swirl the chocolate batter through the vanilla to create that classic marbled appearance. Don’t overwork the pattern—those lovely swirls should look natural and inviting.
Step 7: Bake to Perfection
Pop the pan into the oven and bake for about 30 to 35 minutes. You’ll know it’s done when a toothpick inserted into the center comes out clean. The cake should be golden and springy to the touch.
Step 8: Cool and Unmold
Allow the cake to cool briefly on a wire rack before inverting it carefully onto your serving plate. Let it cool completely so the texture firms up and slicing becomes easier.
How to Serve Classic Marble Cake Recipe
Garnishes
A light dusting of powdered sugar or a drizzle of chocolate glaze can elevate this cake beautifully. For a cozy touch, add a few fresh strawberries or a dollop of whipped cream on the side to complement the cake’s flavors.
Side Dishes
Classic marble cake pairs wonderfully with a steaming cup of coffee or a creamy latte. For a more indulgent snack, serve it alongside vanilla ice cream or fresh custard sauce for a delightful contrast of temperatures and textures.
Creative Ways to Present
For impressing guests, slice the cake into thick wedges and layer them on a tiered dessert stand. Or get creative by stacking small cake rounds with layers of berry compote in between—an eye-catching twist on the traditional presentation!
Make Ahead and Storage
Storing Leftovers
Once completely cooled, store your cake in an airtight container at room temperature for up to three days to keep it moist and fresh. Avoid refrigeration unless it’s very warm or humid, which can dry out the cake.
Freezing
If you want to enjoy the Classic Marble Cake Recipe later, wrap it tightly in plastic wrap and then aluminum foil before placing it in the freezer. It will keep well for up to two months without losing any of its delicious character.
Reheating
To revive frozen or day-old cake, warm individual slices gently in the microwave for about 15 seconds or pop them into a preheated oven at 325 degrees F for 10 minutes. This helps bring back that freshly baked softness.
FAQs
Can I use oil instead of butter in the Classic Marble Cake Recipe?
Yes, you can substitute butter with oil, but butter gives the cake its signature rich flavor and tender crumb. If using oil, choose a neutral one and use about ¾ the amount called for butter.
Is there a gluten-free option for this recipe?
Absolutely! You can substitute the all-purpose flour with a gluten-free baking blend designed for cakes. Just be sure it contains xanthan gum or another binder to maintain texture.
Can I make this cake dairy-free?
Yes, swap the milk for your favorite plant-based milk such as almond or oat milk, and use a dairy-free butter alternative. This way, you can still enjoy the lusciousness without dairy.
How should I cut the cake to best show the marbled design?
Cut the cake into thick slices from the center outwards to showcase the beautiful swirl pattern inside. Avoid slicing too thinly as it can reduce the visual impact.
What type of cocoa powder is best for the marble swirls?
Use unsweetened natural cocoa powder for that rich, deep chocolate color and flavor. Dutch-processed cocoa can be used for a milder taste but may affect the cake’s rise slightly.
Final Thoughts
This Classic Marble Cake Recipe is more than just a dessert; it’s a slice of joy that brings warmth and nostalgia to your kitchen. Its simple ingredients and straightforward steps deliver a cake that impresses both in looks and taste. So grab your mixing bowl and let’s swirl some happiness into your day with this timeless treat!