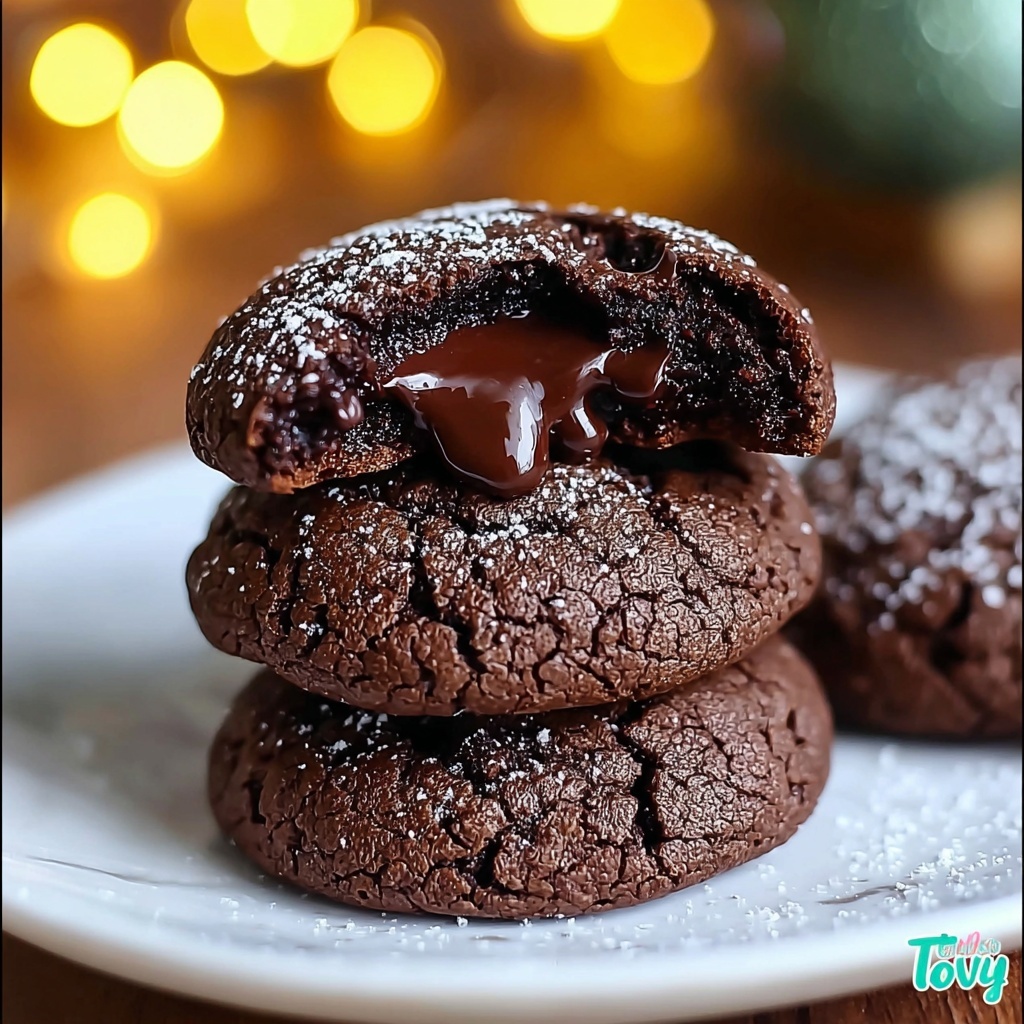
There is nothing quite like indulging in a warm, gooey treat fresh from the oven, which is exactly why the Chocolate Lava Brownie Cookies Recipe has quickly become one of my all-time favorites. These cookies marry the fudgy richness of a classic brownie with the irresistible molten surprise of a chocolate lava center, delivering an unforgettable bite every time. They’re soft on the outside with just the right crackle, while melting decadently inside, making them the perfect comfort dessert for any occasion. Whether you’re baking for yourself, friends, or family, these cookies bring joy with each molten morsel.
Ingredients You’ll Need
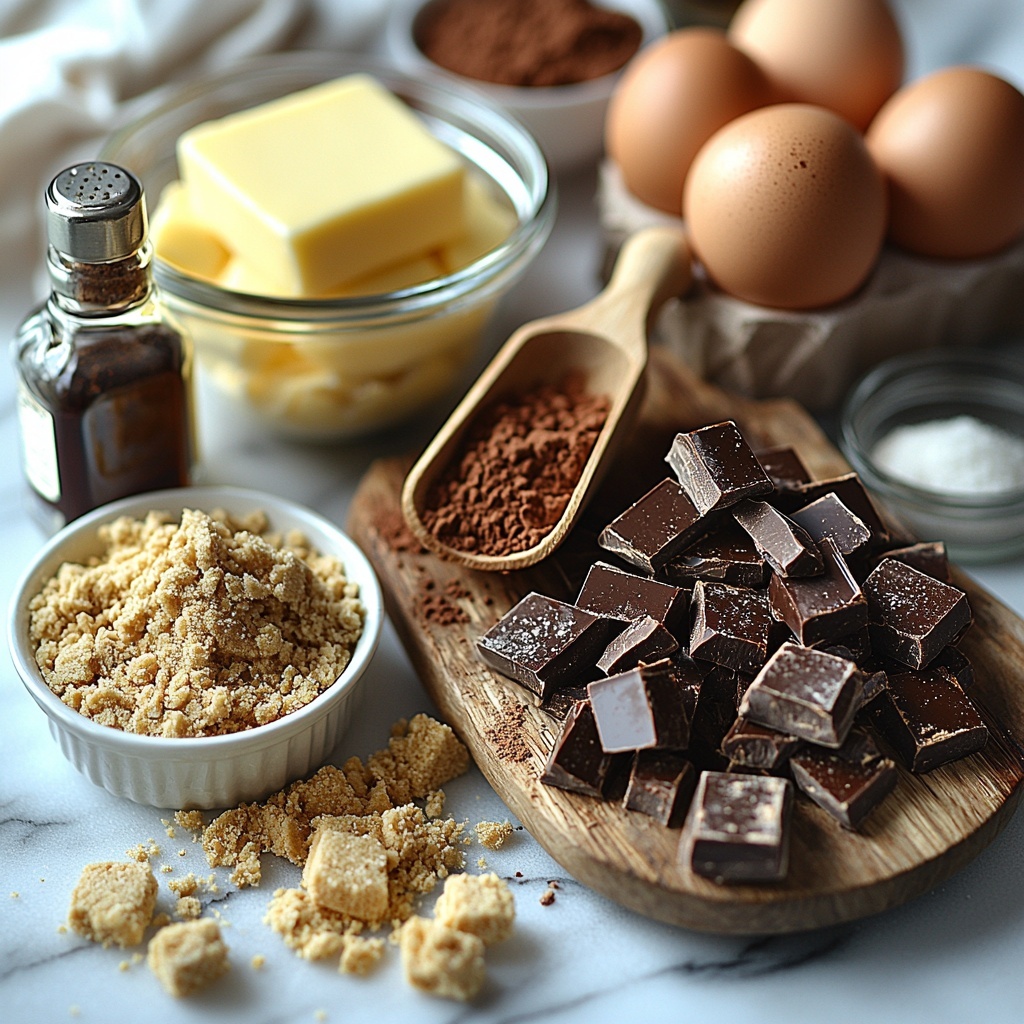
Getting started with the Chocolate Lava Brownie Cookies Recipe is a breeze because it calls for simple, pantry-friendly ingredients. Each one plays a crucial role in creating the perfect balance of richness, texture, and depth of flavor that make these cookies so special.
- 1/2 cup (1 stick) unsalted butter: Softened butter ensures a tender, rich base and helps create that perfect chewy texture.
- 1/2 cup brown sugar: Adds moisture and a mellow caramel flavor that complements the chocolate beautifully.
- 1/4 cup granulated sugar: Balances sweetness and helps with the cookie’s slight crispness on the edges.
- 2 large eggs: Provide structure and richness, binding the ingredients into a smooth dough.
- 1 teaspoon vanilla extract: Enhances the chocolate flavor with a gentle warmth and depth.
- 3/4 cup all-purpose flour: The foundation for structure, giving the cookies a soft bite.
- 1/2 cup unsweetened Dutch-processed cocoa powder: Packed with intense chocolate flavor and a deep, dark color.
- 1/2 teaspoon baking soda: Helps the cookies to rise and create a tender crumb.
- 1/4 teaspoon salt: Balances sweetness and enhances all the chocolate notes.
- 4 oz semi-sweet or dark chocolate bar, cut into chunks: The star of the show—the molten core that melts luxuriously when baked.
How to Make Chocolate Lava Brownie Cookies Recipe
Step 1: Cream the Butter and Sugars
Start by beating the softened butter, brown sugar, and granulated sugar until the mixture becomes light and fluffy. This step is key because it incorporates air into the dough, ensuring your cookies are tender while being deeply flavorful.
Step 2: Incorporate the Eggs and Vanilla
Next, add the eggs one at a time, beating well after each addition. This helps maintain the mixture’s smooth texture. Stir in the vanilla extract, which will beautifully elevate the chocolate notes in the final cookie.
Step 3: Whisk Dry Ingredients Together
In a separate bowl, whisk the all-purpose flour, cocoa powder, baking soda, and salt. Mixing these components well ensures your cookies have even flavor distribution and a reliable rise during baking.
Step 4: Combine Wet and Dry Mixtures
Gradually fold the dry ingredients into the wet butter mixture until just combined. Avoid overmixing here — a light hand keeps the texture soft and luscious.
Step 5: Chill the Dough
Cover your dough and place it in the refrigerator for about 30 minutes. This chilling step firms up the dough, which helps you handle it more easily when stuffing and rolling the cookies later.
Step 6: Prepare the Cookie Centers
Once chilled, scoop out around two tablespoons of dough and gently flatten each piece. This is where the magic happens — you’ll place a chocolate chunk in the center, then fold the dough around it, sealing the edges tightly so that molten lava remains locked inside during baking.
Step 7: Shape and Bake
Roll each stuffed dough piece into a ball and arrange them on a baking sheet lined with parchment paper, leaving space for spread. Bake at 350°F (175°C) for 9 to 11 minutes, just until the edges set but the center remains soft enough to ooze chocolate when bitten into.
Step 8: Cool and Enjoy
Allow the cookies to cool on the baking sheet for 5 minutes before transferring to a wire rack. This short rest lets the cookies firm up slightly while keeping the luscious center molten and ready to delight.
How to Serve Chocolate Lava Brownie Cookies Recipe
Garnishes
Your Chocolate Lava Brownie Cookies Recipe are delightful on their own, but a light dusting of powdered sugar or a sprinkle of flaky sea salt can add a lovely finishing touch. Fresh berries, like raspberries or strawberries, can also contrast the richness with bright sweetness and tang.
Side Dishes
These cookies pair wonderfully with a scoop of vanilla bean ice cream or a drizzle of caramel sauce for a decadent dessert experience. A small glass of cold milk or a cup of rich espresso also complements the chewy, gooey texture beautifully.
Creative Ways to Present
For an impressive presentation, serve your cookies warm in a decorative bowl with a ramekin of warm chocolate or caramel sauce for dipping. Alternatively, sandwich two cookies with a spread of whipped cream or marshmallow fluff for a playful twist. The gooey center is always a crowd-pleaser when revealed at the table!
Make Ahead and Storage
Storing Leftovers
If you have any leftovers from your Chocolate Lava Brownie Cookies Recipe, store them in an airtight container at room temperature for up to three days. This way, they stay soft but retain their molten magic inside when reheated.
Freezing
These cookies freeze beautifully. Place cooled cookies in a single layer on a baking sheet to freeze initially, then transfer them to a freezer-safe bag or container. Frozen cookies keep well for up to two months and thaw in minutes at room temperature or in the microwave.
Reheating
To bring back that signature molten core, reheat cookies gently in the microwave for about 15 to 20 seconds or warm them in a low-temperature oven for 5 to 7 minutes. This quick reheat brings the center to life while keeping the outside soft and inviting.
FAQs
Can I substitute the chocolate chunks with chocolate chips?
Absolutely! Semi-sweet or dark chocolate chips work well if you don’t have a chocolate bar on hand. Just be sure to use larger chips if possible to maintain that gooey center effect.
Why do you chill the dough before baking?
Chilling the dough helps prevent spreading and makes it easier to stuff the chocolate inside without it melting or leaking, which is crucial for achieving that lava center.
Can I use milk chocolate instead of dark chocolate?
You can, but keep in mind that milk chocolate is sweeter and less intense than dark chocolate, so the cookies will be sweeter overall and the center might be a bit softer.
Are these cookies gluten-free?
The recipe calls for all-purpose flour, so these cookies are not gluten-free as written. However, you can try using a gluten-free flour blend with similar baking properties and see how they turn out.
How do I know when the cookies are done baking?
The edges should look set and slightly firm, but the centers will still look soft and a bit underbaked. This ensures the inside stays molten once cooled slightly outside the oven.
Final Thoughts
If you’re craving a dessert that’s both comforting and show-stopping, the Chocolate Lava Brownie Cookies Recipe is an irresistible choice. It’s a fun spin on traditional brownie and cookie recipes, combining the best of both worlds with that luscious molten center. I can’t wait for you to try this recipe and see just how quickly these cookies disappear once the chocolate lava starts to flow. Happy baking and even happier indulging!
Print
Chocolate Lava Brownie Cookies Recipe
- Prep Time: 10 minutes
- Cook Time: 11 minutes
- Total Time: 41 minutes
- Yield: 12 servings
- Category: Dessert
- Method: Baking
- Cuisine: American
Description
These Chocolate Lava Brownie Cookies combine the rich fudgy texture of brownies with the gooey molten center of chocolate lava cake. Soft and chewy on the outside, each cookie hides a warm chocolate chunk inside that melts deliciously while baking, making them an irresistible treat that’s perfect for satisfying any chocolate craving.
Ingredients
Cookies
- 1/2 cup (1 stick) unsalted butter, softened
- 1/2 cup brown sugar
- 1/4 cup granulated sugar
- 2 large eggs
- 1 teaspoon vanilla extract
- 3/4 cup all-purpose flour
- 1/2 cup unsweetened Dutch-processed cocoa powder
- 1/2 teaspoon baking soda
- 1/4 teaspoon salt
Filling
- 4 oz semi-sweet or dark chocolate bar, cut into chunks
Instructions
- Cream Butter and Sugars: In a large bowl, cream together the softened butter, brown sugar, and granulated sugar until the mixture is light and fluffy, ensuring an airy base for the cookies.
- Add Eggs and Vanilla: Beat in the eggs one at a time to fully incorporate them, then stir in the vanilla extract until well combined to enhance the flavor.
- Mix Dry Ingredients: In a separate bowl, whisk together the all-purpose flour, Dutch-processed cocoa powder, baking soda, and salt to evenly distribute the leavening and cocoa.
- Combine Wet and Dry: Gradually add the dry ingredient mixture into the wet ingredients, mixing until just combined to avoid overworking the dough.
- Chill Dough: Cover the dough with plastic wrap and refrigerate for 30 minutes to firm up, which makes it easier to shape and helps control spreading during baking.
- Prepare Cookies: Scoop about 2 tablespoons of dough and flatten it slightly with your hands or a spoon.
- Add Chocolate Filling: Place a chunk of semi-sweet or dark chocolate in the center of the flattened dough round, then fold the edges over to fully enclose the chocolate.
- Shape Cookies: Roll the sealed dough into a smooth ball, ensuring the chocolate is completely encased, and place the balls spaced apart on a parchment-lined baking sheet.
- Bake: Bake the cookies in a preheated oven at 350°F (175°C) for 9 to 11 minutes, or until the edges are set but the centers remain soft to maintain that molten lava effect.
- Cool: Let the cookies cool on the baking sheet for 5 minutes before transferring them to a wire rack to cool completely, allowing them to set while preserving the gooey center.
Notes
- Refrigerating the dough is crucial for handling and helps cookies keep their shape while baking.
- Use good quality semi-sweet or dark chocolate for the filling for the best molten effect and taste.
- Do not overbake; the center should remain soft to achieve the lava effect inside the cookie.
- Cookies can be stored in an airtight container at room temperature for up to 3 days or frozen for longer storage.


