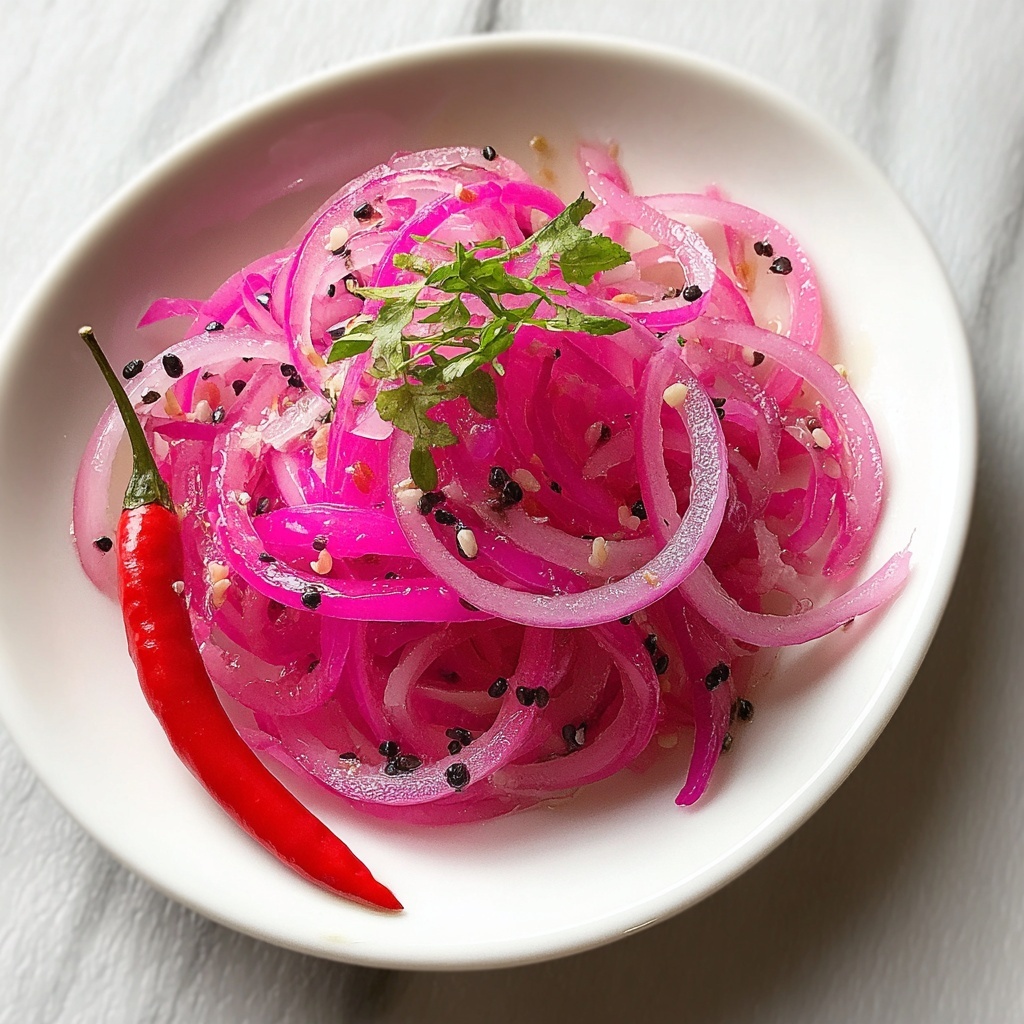
If you’re searching for a simple yet sensational way to elevate your meals, this Pickled Red Onions Recipe is exactly what you need. Tangy, vibrant, and bursting with complex flavors, these pickled onions transform ordinary dishes into extraordinary ones. Whether you’re topping tacos, spicing up salads, or adding a colorful crunch to burgers, these onions are your new best friend in the kitchen. Plus, they’re incredibly easy to make with basic ingredients that come together to create that perfect balance of sweet, sour, and savory notes you’ll crave again and again.

Ingredients You’ll Need
Making pickled red onions is surprisingly straightforward thanks to a handful of simple yet essential ingredients. Each one plays a crucial role: the vinegar provides the signature tang, sugar and salt balance the flavors, and spices add depth and a little warmth to the mix.
- 2 medium red onions, thinly sliced: Choose firm, fresh onions for the best crunch and color.
- 1 cup apple cider vinegar: This gives a bright acidity that’s milder and fruity compared to other vinegars.
- 1 cup water: Dilutes the vinegar to mellow the sharpness and helps the flavors meld.
- 1 teaspoon granulated sugar: Balances the tartness with a subtle sweetness.
- 1 teaspoon salt: Enhances all the flavors and aids the pickling process.
- 1/2 teaspoon whole black peppercorns: Adds a gentle spicy kick and aroma.
- 1/2 teaspoon mustard seeds: Offers a slight nuttiness and a touch of heat.
- 1 bay leaf: Infuses a warm, earthy undertone.
- Optional: 1 clove garlic, peeled and sliced: For an extra layer of savory depth.
- Optional: 1 small chili pepper, sliced: Introduces a hint of heat if you’re feeling adventurous.
How to Make Pickled Red Onions Recipe
Step 1: Prepare Your Jar
Start by sterilizing a glass jar or container with a tight-fitting lid. Washing it in hot, soapy water ensures your onions stay fresh and safe while pickling. This might be a small step, but it’s a crucial one.
Step 2: Slice the Red Onions
Peel two medium red onions and slice them thinly. Thin slices mean your onions soak up the pickling liquid perfectly, softening just enough while still maintaining a satisfying crunch. Place the slices directly into your clean jar to get ready for pickling.
Step 3: Combine the Pickling Liquid Ingredients
In a small saucepan over medium heat, mix together the apple cider vinegar, water, sugar, and salt. Stir the mixture until the sugar and salt fully dissolve—this ensures the flavors will be evenly distributed throughout your pickled onions.
Step 4: Add the Spices
Now it’s time to add those flavorful touches—add the whole black peppercorns, mustard seeds, and bay leaf to the mixture. If you love garlic or enjoy a little spice, toss in the sliced garlic clove and chili pepper. These extras give your pickled red onions a unique, mouthwatering kick.
Step 5: Pour the Hot Liquid Over the Onions
Bring the mixture to a gentle simmer, then carefully pour the hot pickling liquid over the sliced onions in your jar. Make sure the onions are entirely submerged so every slice can soak up the incredible flavor.
Step 6: Let It Cool
Allow the jar to sit and cool to room temperature before sealing the lid tightly. This helps prevent condensation and keeps the vinegar solution just right for pickling.
Step 7: Chill and Infuse Flavor
Pop your jar in the refrigerator for at least one hour to start the pickling magic. For ultimate taste, wait a full 24 hours. The longer they sit, the more complex and delicious your pickled onions will become.
Step 8: Store Properly
Keep your pickled red onions refrigerated and enjoy them for up to two weeks. This Pickled Red Onions Recipe ensures you always have a little jar of vibrant flavor ready to brighten your meals.
How to Serve Pickled Red Onions Recipe
Garnishes
Pickled red onions instantly add a pop of color and tartness as a garnish. Whether atop avocado toast, grilled meats, or fresh salads, their crisp texture and tangy zing create a beautiful contrast that highlights the main dish.
Side Dishes
Serve pickled red onions alongside rich or creamy sides like mac and cheese, roasted potatoes, or coleslaw. Their acidity cuts through the richness, balancing flavors and preventing palate fatigue with every bite.
Creative Ways to Present
Try layering pickled red onions in sandwiches, wraps, or even tacos to inject brightness and complexity. You can also incorporate them into cheese boards or charcuterie platters to provide a fresh, palate-cleansing bite between stronger cheeses and cured meats.
Make Ahead and Storage
Storing Leftovers
Once you’ve made your jars of pickled onions, keep them refrigerated with the lid tightly sealed. Stored this way, they stay crisp and flavorful for up to two weeks, giving you plenty of time to enjoy their zingy goodness.
Freezing
Freezing isn’t recommended for pickled red onions since the texture will suffer—once thawed, they tend to become limp and mushy. It’s best to eat them fresh within the storage window to enjoy their full snap and crunch.
Reheating
Pickled red onions are designed to be enjoyed cold or at room temperature. Reheating is unnecessary and not advised, as it can soften their crisp texture and dull their vibrant flavor. Just scoop and serve straight from the fridge!
FAQs
Do I have to use apple cider vinegar in this Pickled Red Onions Recipe?
Apple cider vinegar is preferred for its mild, fruity acidity, but you can substitute white vinegar or red wine vinegar if needed. Just keep in mind it will slightly alter the flavor profile.
How long do pickled red onions last?
When stored properly in the refrigerator, pickled red onions will maintain their quality and flavor for up to two weeks.
Can I make this recipe without sugar?
The sugar balances the acidity and rounds out the flavor, but you can reduce or omit it if you prefer. Expect the final taste to be a bit more tart and sharp.
Are there variations of the spices used in this Pickled Red Onions Recipe?
Absolutely! Feel free to experiment with coriander seeds, cloves, or even cinnamon sticks to tailor the pickles to your taste preferences.
How thin should I slice the onions?
The thinner, the better. Thin slices absorb the pickling liquid faster and evenly, giving you crisp, flavorful onions within hours or a day.
Final Thoughts
I can’t recommend this Pickled Red Onions Recipe enough—it’s an absolute game changer to have in your culinary toolkit. With just a few simple steps and ingredients, you’ll have a jar of tangy, crunchy onions ready to bring freshness and flavor to an endless array of dishes. Trust me, once you make these, you’ll wonder how you ever lived without their zingy magic!
Print
Pickled Red Onions Recipe
- Prep Time: 0h 15m
- Cook Time: 0h 10m
- Total Time: 0h 25m
- Yield: About 2 cups of pickled onions
- Category: Condiment
- Method: Stovetop
- Cuisine: American
- Diet: Low Fat
Description
This easy recipe for Pickled Red Onions offers a tangy, flavorful condiment that enhances any dish with its bright, acidic punch and crunchy texture. Thinly sliced red onions are soaked in a warm vinegar-based brine infused with spices and optional garlic and chili for added depth. Perfect to keep on hand in the refrigerator, these pickled onions provide a quick way to brighten salads, tacos, sandwiches, and more.
Ingredients
Pickling Brine
- 1 cup apple cider vinegar
- 1 cup water
- 1 teaspoon granulated sugar
- 1 teaspoon salt
- 1/2 teaspoon whole black peppercorns
- 1/2 teaspoon mustard seeds
- 1 bay leaf
Onions and Optional Flavors
- 2 medium red onions, thinly sliced
- Optional: 1 clove garlic, peeled and sliced
- Optional: 1 small chili pepper, sliced
Instructions
- Sterilize the Jar: Begin by sterilizing a glass jar or container with a tight-fitting lid by washing it in hot, soapy water to ensure it is clean and safe for storing the pickled onions.
- Prepare Onions: Peel the red onions and slice them thinly, then place the slices into the sterilized jar, arranging them evenly.
- Make the Pickling Brine: In a small saucepan over medium heat, combine the apple cider vinegar, water, sugar, and salt. Stir continuously until the sugar and salt are completely dissolved into the liquid.
- Add Spices and Optional Ingredients: Add the whole black peppercorns, mustard seeds, and bay leaf to the saucepan. If desired, include the peeled garlic slices and sliced chili pepper for extra flavor complexity.
- Simmer the Brine: Bring the mixture to a gentle simmer to help infuse the flavors from the spices and optional ingredients into the brine.
- Pour Brine over Onions: Carefully pour the hot pickling liquid over the sliced onions in the jar, making sure the liquid fully covers the onions to ensure even pickling.
- Cool and Seal: Allow the jar and contents to cool to room temperature before securely closing the lid to prevent condensation and spoilage.
- Refrigerate and Marinate: Refrigerate the jar for at least one hour before serving. For the best flavor development, let the pickled onions marinate for at least 24 hours. Store refrigerated and use within two weeks for optimal freshness.
Notes
- Sterilizing the jar is important to prevent any unwanted bacteria from spoiling the pickled onions.
- Thin slicing the onions helps them absorb the brine faster and evenly.
- Adjust the amount of sugar and salt in the brine to taste; some prefer sweeter or saltier pickled onions.
- Optional garlic and chili add a nice heat and flavor complexity but can be omitted if desired.
- Pickled onions will keep refrigerated for up to two weeks; always use a clean utensil to avoid contamination.
- Allowing the onions to marinate for at least 24 hours greatly improves their flavor and texture.

